Skip to content >

- Quick Answer
- Why Plan for an Elevator During Home Design, Not After
- Where to Place an Elevator in Your Floor Plan
- Space Requirements by Elevator Type
- Sample Home Plan Concepts
- Working with Your Architect on Elevator Integration
- Common Floor Plan Mistakes When Adding an Elevator
- Retrofitting vs. New Construction Planning
- Aging-in-Place Considerations for Elevator-Ready Home Plans
- Cost Considerations in the Planning Phase
- FAQs
- Ready to Plan Your Home Elevator?
Quick Answer
Planning a home with an elevator is easier when you incorporate it during the design phase rather than retrofitting later. The key decisions are where to place the elevator in your floor plan, what type of elevator fits your architectural style, how much space to allocate for the shaft, and whether your home’s construction supports the elevator you want. Pneumatic vacuum elevators require the least architectural accommodation (no pit, no machine room), making them the most flexible option for both new construction and floor plan modifications.
Why Plan for an Elevator During Home Design, Not After
The decisions homeowners face when adding an elevator to an already-built home are fundamentally different from those they face during design. During design, the elevator becomes an integrated part of the home’s flow, architecture, and aesthetic. Added later, it becomes an accommodation to existing structure.
Planning ahead pays off in three concrete ways. First, you can position the elevator centrally in the floor plan rather than tucking it into whatever corner has room. Second, you can select the elevator type based on what fits your vision, not what fits your existing walls. Third, you avoid the retrofit costs of pit excavation, machine room construction, or structural reinforcement that a fully-built home often requires.
For homeowners already living in their forever home, retrofitting is still possible — pneumatic vacuum elevators install in existing homes with minimal structural work. But if you’re at the design stage, planning the elevator in early is worth the effort.
Where to Place an Elevator in Your Floor Plan
Placement is the decision that determines whether your elevator feels like a natural part of your home or an afterthought bolted into the nearest available space. It affects how you use the elevator every day, how it looks, and how much value it adds to your home. The right placement varies by floor plan, but the underlying principles are consistent.
Central vs. Corner Placement
The two most common placement strategies are central (near the middle of the home, close to the main staircase) and corner (tucked into a less-trafficked area).
Central placement works best when:
- The elevator will be used daily by residents with mobility needs
- You want short walking distances between the elevator and the rooms people use most (primary bedroom, kitchen, main living area)
- The elevator is meant to be a design feature, not hidden
- You want the elevator to serve as a natural focal point in an open floor plan
Corner placement works best when:
- The elevator is a future-proofing investment for aging in place, not immediate daily use
- You want to preserve the traditional feel of the home’s central spaces
- Your floor plan doesn’t have an obvious central location that accommodates a shaft
- You’re retrofitting and the corner is where the structural work is most feasible
Central placement usually wins when accessibility is the primary reason for the elevator. Corner placement usually wins when the elevator is one accessibility feature among many in a broader design.
Proximity to the Staircase
Positioning the elevator near the main staircase is almost always the right call. Three reasons.
First, it creates a natural vertical circulation zone in the home. Guests and residents intuitively find both options in the same spot, which reduces the “where is the elevator?” moment that awkward placements create.
Second, it keeps the mechanical and structural work concentrated in one part of the home. The shaft, the structural support, the framing modifications, and the upper floor landing all cluster together. Contractors work more efficiently and the finished home reads more cohesively.
Third, it makes the elevator feel like a choice, not a necessity. When the stairs and elevator sit side by side, someone can walk when they want to and ride when they need to. That daily flexibility is what makes an elevator feel like a home upgrade rather than a medical device.
The exception is when the staircase is in a location that doesn’t serve the rooms the elevator user needs to reach. If the stairs land at one end of the upstairs hallway and the primary bedroom is at the other, placing the elevator by the stairs forces a long walk after every ride. In that case, position the elevator closer to the primary bedroom and accept that it won’t sit next to the staircase.
Garage Integration
Garage placement is a strong option in homes where the garage is on the lowest level and the main living areas sit above it. Common in coastal homes, hillside builds, and townhouses.
Garage integration works when:
- The garage is on a full floor below the main living level
- Residents load groceries, luggage, or mobility equipment from the garage regularly
- You want to eliminate carrying items up interior stairs
- The garage has enough ceiling clearance for the elevator’s mechanical footprint
The upper landing typically opens into a mudroom, kitchen, or hallway near the kitchen — a natural transition point from vehicle to interior. This placement pattern rewards daily use because it removes friction from the most common trips homeowners actually make.
The tradeoff: garage-adjacent placement uses corner-of-the-home logic, which can put the elevator far from bedrooms on the upper floors. If aging-in-place accessibility is the primary goal, garage integration alone may not be enough. You may want a second elevator location or a plan that puts the primary bedroom on the main floor.
Kitchen and Living Room Adjacency
The kitchen is the most-used room in most homes, and its adjacency to the elevator matters more than most homeowners initially realize.
An elevator that opens near the kitchen makes it easier to move groceries, cookware, and daily items between floors. It also puts the elevator in a high-traffic zone that keeps it feeling integrated rather than isolated. For families with young children or multigenerational households, kitchen adjacency turns the elevator into a practical tool rather than a specialty appliance.
Living room adjacency serves a different purpose. When the elevator opens into or near the main living area, it becomes part of the home’s social flow. Guests use it comfortably. Residents feel less self-conscious about needing it. In homes where the elevator is meant to blend into daily life rather than announce itself, living room adjacency softens its presence.
Avoid placing the elevator so its door opens directly into a formal dining room, a home office, or any room where privacy matters. The doors open and close throughout the day, and that traffic doesn’t belong in rooms designed for quiet or concentration.
Upstairs Landing Location
The upper floor landing gets less attention than it deserves. Homeowners spend hours deciding where the elevator sits on the main floor and almost no time thinking about where it lets them out upstairs.
A good upper landing has three qualities.
Enough clear floor space to exit comfortably. Plan for at least three by five feet of clear floor at the landing. Cramped landings feel claustrophobic and create wheelchair access issues.
Direct sightlines to the rooms the user is heading toward. If the elevator opens into a hallway that requires a sharp turn to reach the primary bedroom, everyday use becomes tedious. A landing that looks straight down the hall toward the destination rooms feels intuitive.
Enough distance from bedroom doors that elevator noise doesn’t intrude. Even a quiet elevator makes some sound during operation. Don’t position the landing directly outside a bedroom door if you can help it.
If the upper floor has a central hallway, the landing usually works best midway down that hallway, close to the rooms it serves without being immediately adjacent to any bedroom door.
Design Feature or Hidden?
Every home elevator makes an aesthetic choice, even when the homeowner doesn’t think of it that way. The elevator either becomes a visible part of the home’s design language or gets tucked away where it doesn’t compete with the surrounding architecture.
Make it a design feature when:
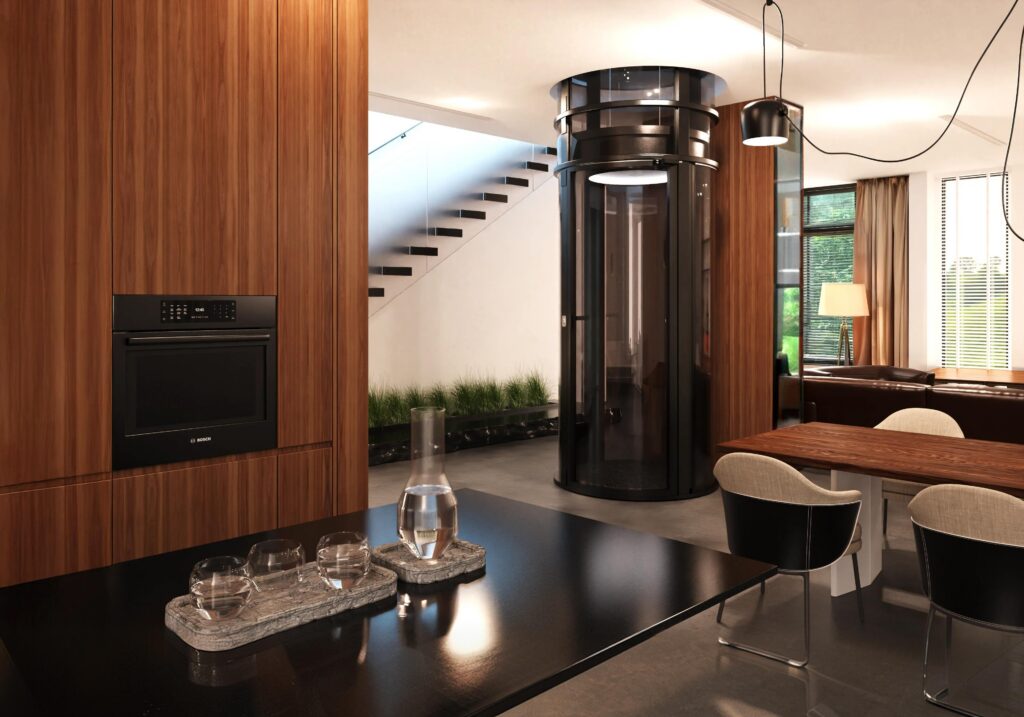
- You’ve chosen a pneumatic vacuum elevator with a cylindrical glass tube
- Your home is contemporary, modern, or transitional in style
- The floor plan is open and the elevator can sit visibly in that flow
- You want the elevator to signal thoughtful, forward-looking design
Hide it when:
- Your home is traditional and the elevator would look out of place in the main sight lines
- You’ve chosen a hydraulic elevator that requires a paneled cab
- You want the home to read as a conventional layout to future buyers
- The elevator is a functional necessity you don’t want to emphasize
The hybrid approach also works. Place the elevator in a hallway alcove or near a staircase where it’s accessible and known but not the first thing visitors see. This is the most common pattern in custom homes and works for nearly any elevator type.
Common Architectural Placement Patterns
A handful of placement patterns repeat across well-designed homes with elevators.
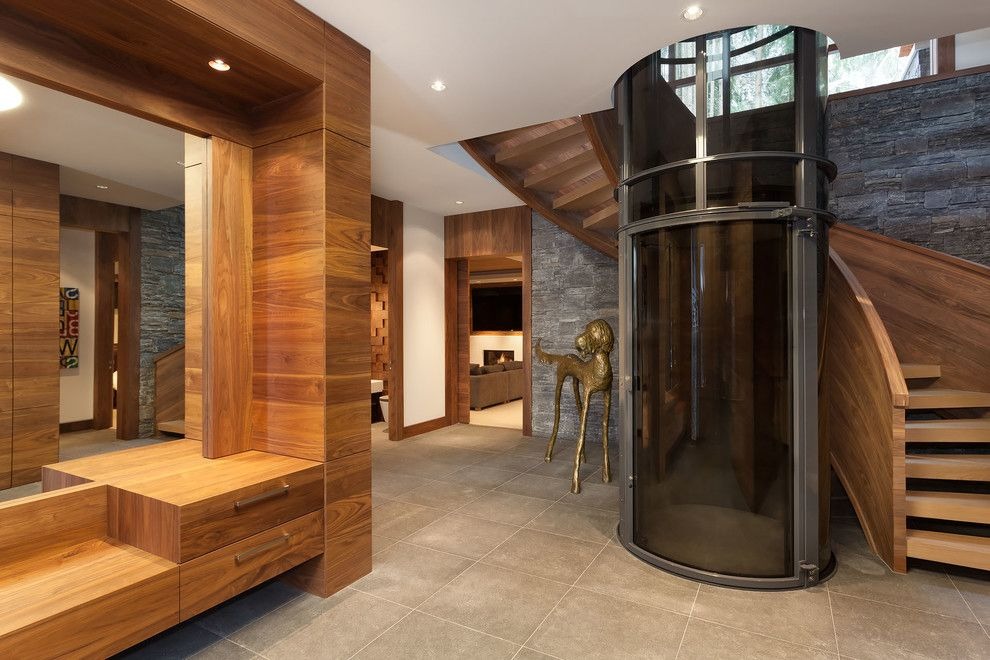
The staircase companion. Elevator sits directly next to or opposite the main staircase, creating a vertical circulation zone. Works in most home styles and floor plans. The default choice when nothing else drives placement.
The garage lift. Elevator connects the garage to the main living level, opening into or near the mudroom or kitchen upstairs. Works especially well in coastal, hillside, and townhouse designs where the garage is on the lowest floor.
The primary suite connection. Elevator sits between the main floor common areas and the upstairs primary bedroom, with the upper landing feeding directly into or near the primary suite. Ideal for aging-in-place designs where the primary bedroom moved upstairs to preserve main floor space.
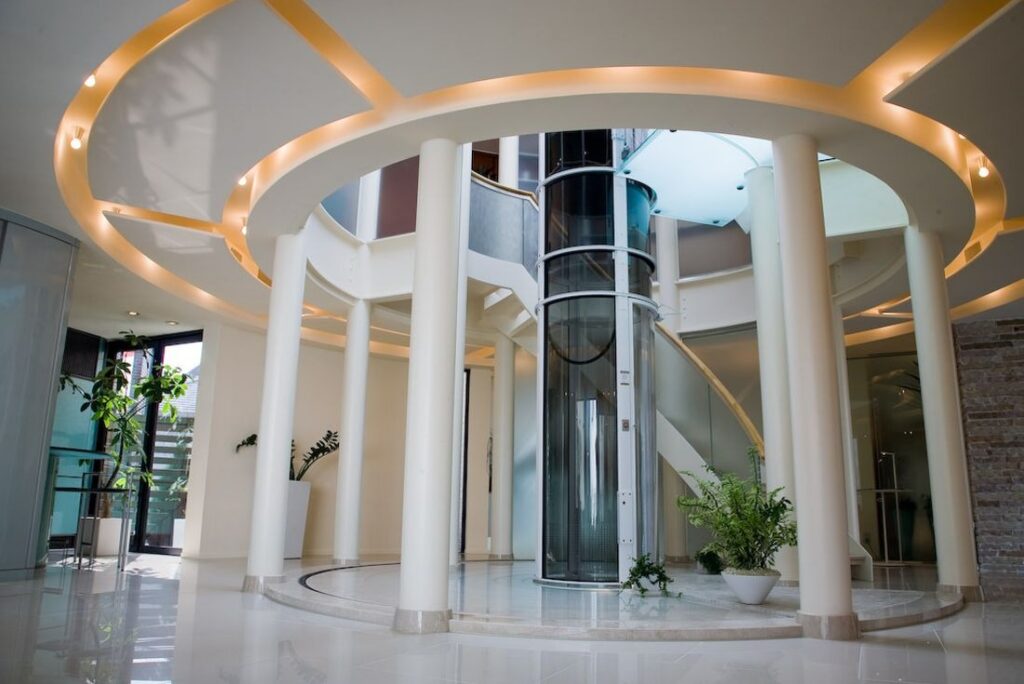
The central atrium. Elevator sits in the middle of an open floor plan, often with a glass tube that becomes a visible architectural feature. Works in contemporary and modern homes with double-height ceilings and open sight lines.
The service corridor. Elevator sits along a back hallway or service corridor, out of primary sight lines but accessible. Common in traditional homes where the elevator is a functional necessity rather than a design element.
Match the pattern to the way your family actually lives, not to what looks impressive in floor plan renderings. The best elevator placement is the one you barely notice using every day.
Space Requirements by Elevator Type
Different elevator types demand different amounts of floor plan real estate. Understanding these requirements early keeps your architect from designing around constraints you didn’t need to accept.
Pneumatic vacuum elevators require the smallest footprint. The cylindrical shaft ranges from 30 to 52 inches in diameter depending on the model. No pit, no machine room, and no counterweight system means the elevator’s total footprint is essentially its cab size. This makes pneumatic systems the most flexible option for tight floor plans.
Hydraulic elevators require a rectangular shaft plus a dedicated machine room to house the pump, reservoir, and control equipment. Most configurations also need a pit dug beneath the lowest floor. Plan for roughly 12-15 square feet for the shaft itself plus 20-40 square feet for the machine room.
Traction elevators need a constructed shaft, pit, and either a machine room or overhead space for a machine-room-less (MRL) system. Space demands are similar to hydraulic but require more overhead clearance.
Shaftless elevators connect two floors through a cut in the ceiling, using minimal footprint but limited to two floors and lower capacity. Good for compact designs with modest travel requirements.
For a full comparison of elevator types and their space demands, see the types of home elevators.
Sample Home Plan Concepts
Here are four common home styles and how a home elevator typically integrates into each. These concepts illustrate placement strategies, not literal blueprints. Your architect will adapt them to your specific plot, square footage, and lifestyle needs.
1. Single-Story Ranch with Elevator to Basement
The classic ranch layout keeps all primary living on one level: primary bedroom, kitchen, main living area, and often the laundry. The elevator’s job in a ranch isn’t to connect bedrooms to bathrooms. It’s to connect the main floor to a finished basement.
The elevator typically sits near the main hallway or in a utility corridor that runs between the kitchen and the garage. The upper landing sits on the main floor, opening into that hallway. The lower landing opens into the finished basement, usually near the recreation area, home gym, or guest suite that draws residents downstairs regularly.
Space impact is minimal. A pneumatic vacuum elevator uses roughly 7 to 15 square feet on each floor for the shaft, plus a few square feet of clear landing space at each opening. No pit is required, which matters because ranches often sit on slab foundations that can’t accommodate one without significant cost.
Best use case: homeowners who use their basement daily (whether for storage, hobbies, guest space, or a home office) and want to eliminate the stair trip. Also strong for aging-in-place planning when the basement contains a laundry room, storage the homeowner accesses regularly, or a secondary living area that would otherwise become inaccessible.
2. Traditional Two-Story Colonial
The colonial’s defining feature is a central staircase in the front entryway, with formal living and dining rooms flanking the entrance and the family living space toward the back. Upstairs holds the primary bedroom, secondary bedrooms, and shared bathrooms.
The most common elevator placement in a colonial is a dedicated shaft near the central staircase, either directly adjacent to it or tucked into a small alcove behind the stairs. The upper landing opens into the upstairs hallway, ideally midway between the primary bedroom and the shared bathrooms. Some colonial designs also place the elevator further back in the home, near the kitchen or family room, when the goal is to prioritize daily use over central circulation.
Aesthetic integration matters here. Traditional colonials feature crown molding, wainscoting, hardwood floors, and formal architectural details. A glass pneumatic tube can feel jarring in this setting. Homeowners in traditional colonials often choose a hydraulic elevator with a paneled cab finished to match the interior woodwork, or place a pneumatic elevator in a less visible location where the modern aesthetic doesn’t compete with the traditional design language.
Best use case: multi-generational households, aging homeowners committed to staying in a traditional home they love, and buyers who prioritize the colonial’s classic architectural presence while adding accessibility for the long term.
3. Split-Level Home
Split-levels are the home style that benefits most from thoughtful elevator planning. They also present the most complex placement decisions.
The defining feature of a split-level is multiple half-levels connected by short stair runs. A typical split-level has four levels: the lower entry (garage and mechanical), the main living level (kitchen, dining, living), the upper bedroom level (primary and secondary bedrooms), and the lowest finished basement level. That’s three to four stair transitions in a single home, each one a barrier for anyone with mobility limitations.
Elevator placement in a split-level works best when the elevator connects the two levels the resident uses most, not necessarily every level in the home. For most homeowners, that means the main living level and the upper bedroom level. The elevator sits along a shared wall between these two levels, often near the existing stair transition. The garage and basement levels can remain accessible only by stairs if they’re used less frequently.
Homeowners who need full accessibility across all four levels sometimes choose a taller pneumatic model that can serve more stops, or plan two smaller lifts (one connecting the garage to the main level, one connecting main to bedrooms). Two smaller elevators is uncommon but occasionally the right answer for large or heavily used split-levels.
Best use case: aging-in-place homeowners in split-levels who love the home but face daily fatigue from constant stair transitions. A well-placed elevator can transform a split-level from a home that becomes hard to live in over time into one that stays fully usable for decades.
4. Modern Contemporary Multi-Level
Contemporary homes prioritize open floor plans, generous sight lines, natural light, and the visible integration of modern materials. The elevator in a contemporary home isn’t hidden — it becomes part of the design language.
The typical placement puts a pneumatic vacuum elevator with a cylindrical glass tube in a visible location: near the main entry, adjacent to the central staircase, or in the middle of an open living area. The glass tube becomes an architectural feature, not an accommodation. Natural light passes through it. The mechanical motion of the cab is visible from the surrounding rooms. Guests notice it and remember it.
Multi-level contemporary homes (three or four floors) benefit especially from this placement approach because the elevator’s vertical line reinforces the home’s vertical architecture. In double-height living rooms with floor-to-ceiling windows, a glass elevator tube reads as a continuation of the design vocabulary rather than a break from it.
Space integration is easier in contemporary homes than in traditional ones. Open floor plans have fewer walls to work around. Modern architects and their clients tend to embrace visible mechanical elements. The pneumatic elevator’s cylindrical footprint (30 to 52 inches depending on the model) fits naturally into open living areas without needing dedicated walls or shafts.
Best use case: architects, designers, and design-forward homeowners who want the elevator to signal modernity, environmental awareness, and forward-thinking design. Also strong for luxury homes at the top of the market, where the pneumatic elevator’s aesthetic distinguishes the home from more traditional luxury builds.
Working with Your Architect on Elevator Integration
Most residential architects have limited experience with home elevators. This is a market reality. If you’re planning an elevator, your architect will benefit from specific input at three points in the design process.
During schematic design: Share your elevator preference (type and model) before floor plans are drafted. Give the architect the shaft dimensions, clearances, and any structural requirements from the manufacturer. This lets the architect design around known constraints instead of trying to fit an elevator into a plan that’s already locked.
During construction documents: Confirm the shaft opening, upper floor landing, electrical requirements, and structural support with the elevator manufacturer’s technical drawings. PVE provides specifications and 3D models that architects can drop directly into their drawings.
During framing: Coordinate the framing carpenter’s schedule with the elevator installation timeline. Pneumatic vacuum elevators install after framing is complete, so the shaft opening needs to be framed correctly but the elevator itself arrives later.
Bring your elevator dealer into the conversation early. Manufacturers and dealers regularly collaborate with architects on new home projects and can provide the technical specifications your architect needs.
Common Floor Plan Mistakes When Adding an Elevator
A handful of design mistakes appear repeatedly when homeowners plan an elevator into new construction. Knowing them in advance saves time, money, and regret.
Placing the elevator too far from where it’s needed. An elevator that requires a long walk from the primary bedroom to reach it defeats the accessibility purpose. Position the elevator between the spaces someone with mobility limitations uses most, typically the primary bedroom, kitchen, and main living area.
Overlooking upper floor landing space. The upper landing needs enough clear floor area for someone to comfortably exit the elevator. A cramped landing that opens into a narrow hallway feels claustrophobic and can create wheelchair access issues.
Ignoring aesthetic integration. An elevator that looks like a mechanical afterthought lowers the perceived quality of the home. Pneumatic glass tubes work as architectural features. Hydraulic cabs can be finished to match interior design. Plan the aesthetic integration alongside the mechanical integration.
Under-planning electrical requirements. Home elevators need a dedicated electrical circuit, sometimes a specific voltage, and in many cases battery backup for safe descent during power loss. Confirm requirements with the manufacturer and share with your electrician during rough-in.
Designing for today’s needs only. The homeowner who plans an elevator “for later” but doesn’t think about wheelchair-accessible dimensions may regret it if mobility changes. If the elevator is going in as an aging-in-place investment, size it for a wheelchair user with a companion (which is what the PVE52 accommodates).
Retrofitting vs. New Construction Planning
New construction gives you full flexibility. Retrofitting an existing home limits your options but doesn’t eliminate them.
In new construction, you can plan any elevator type, place it anywhere the floor plan allows, and integrate it seamlessly with electrical, structural, and finish work. The cost premium over a house without an elevator is primarily the elevator itself — construction accommodations are built in.
In retrofits, the constraints depend on your home. Pneumatic vacuum elevators install in 2 to 3 days with minimal structural work, making them the most retrofit-friendly option. Hydraulic and traction elevators typically require significant renovation to add pit, shaft, and machine room space. Homes on slab foundations often can’t retrofit hydraulic without major cost. Homes with basements have more options.
For homeowners considering both a new home and staying in the current one, the elevator type available for a retrofit may influence which choice makes sense. If you love your current home and want to age in place, pneumatic vacuum elevators make that possible without the disruption of moving.
Aging-in-Place Considerations for Elevator-Ready Home Plans
Homeowners planning for aging in place have a distinct set of design priorities that go beyond just “add an elevator.”
Consider these design principles alongside elevator placement:
- Primary bedroom on main floor: Even with an elevator, having a primary bedroom on the main floor reduces reliance on the elevator and provides a fallback if the elevator is ever out of service.
- Wider doorways and hallways: 36-inch doorways and 42-inch hallways accommodate wheelchairs and walkers. Plan these throughout, not just near the elevator.
- Curbless showers and roll-in access: Bathroom design matters as much as elevator design for full accessibility.
- Zero-step entries: At least one entrance to the home should be step-free from the driveway.
- Kitchen accessibility: Countertop heights, cabinet reach, and appliance placement all affect long-term usability.
A whole-home aging-in-place approach uses the elevator as one component of a broader accessible design, not the only accommodation.
Cost Considerations in the Planning Phase
Understanding cost during planning helps you budget for both the elevator and the surrounding construction it may require.
Pneumatic vacuum elevators typically run $35,000 to $100,000+ installed depending on the model and finish options. Because installation requires no structural excavation, most of the cost is the elevator itself. Plan this as a fixed cost with predictable variables.
Hydraulic elevators range from $30,000 to $70,000+ for the elevator, plus additional construction costs for the pit, machine room, electrical, and finish work. In new construction, these costs can be absorbed into the broader build. In retrofits, they may double the total investment.
Traction elevators are typically the most expensive option at $40,000 to $80,000+ before construction costs, but they offer higher travel heights and smoother rides.
Shaftless and through-floor lifts range from $15,000 to $40,000+ and are the most cost-effective for two-floor accessibility applications.
FAQs
Do I need a special architect to design a home with an elevator?
No, but you do need an architect who’s willing to coordinate with your elevator manufacturer. Most residential architects don’t specialize in elevator integration, but any competent architect can incorporate one when given the manufacturer’s specifications and 3D models. PVE provides architect-ready technical drawings for all models.
How much square footage should I allocate for an elevator?
A pneumatic vacuum elevator uses roughly 7 to 15 square feet depending on the model, with no pit or machine room. Hydraulic elevators require 12 to 15 square feet for the shaft plus 20 to 40 square feet for the machine room. Plan for landing area at each floor as well — a minimum of 3 by 5 feet of clear floor space at each level.
Can I add an elevator to an existing home plan I’ve already purchased?
Yes. Stock home plans can be modified to incorporate an elevator, though the ease depends on the plan’s structure. Simpler modifications work best in plans with a designated shaft or closet space near a central staircase. Ask your builder or architect to review the plan and recommend the least disruptive placement.
Are homes with elevators more valuable at resale?
In markets with aging populations or luxury home segments, elevators can add resale value. In markets targeting younger families, the impact is smaller. The elevator’s greatest value is usually functional — it lets homeowners stay in their homes longer and use every floor comfortably — rather than as a pure resale investment.
What’s the best elevator type for a custom-built home?
It depends on your design priorities. If you want the elevator to be a design feature with panoramic visibility, a pneumatic vacuum elevator’s glass tube is unmatched. If you want the elevator to blend into a traditional aesthetic with custom cab finishes, a hydraulic elevator gives you more customization. If you want the fastest installation with minimal construction impact, pneumatic wins. Match the type to what you value most.
Ready to Plan Your Home Elevator?
For homeowners at the design stage, the earlier a home elevator enters the conversation, the more integrated the final result becomes. PVE elevators have been chosen by architects, builders, and homeowners for over two decades specifically because they’re the easiest to integrate into a floor plan: no pit, no machine room, minimal structural change, and installation in days rather than weeks.
Explore the models that fit different home plans:
- PVE30: One passenger, smallest footprint, ideal for compact floor plans and single-user homes
- PVE37: Two passengers, most popular residential configuration, fits most home plans
- PVE52: Two to three passengers or wheelchair accessible, best for aging-in-place and multigenerational design
- The Cube: Rectangular footprint alternative, fits home plans where a cylindrical shaft doesn’t work architecturally