


Home elevators typically need 7 to 25 square feet of floor space. Pneumatic vacuum elevators require the least (7 to 9 square feet) because they don’t need a shaft, pit, or machine room. Hydraulic and cable systems sit at the high end (20 to 25 square feet) because of the additional structural work. Overhead clearance of 80 to 100 inches is required above the top landing regardless of type.
Home elevators need between 7 and 25 square feet of floor space, depending on the type of system and how it is installed. Traditional systems that require a shaft, pit, and machine room sit at the high end of that range. Pneumatic vacuum elevators, which do not need any of those, can fit into as little as 7 to 9 square feet.
This guide is for homeowners in the planning stage: figuring out how much room to set aside, what kind of construction each system involves, and which type actually fits the space you have. If you need exact hoistway specs and code measurements instead, see the detailed residential elevator dimensions guide.
The floor space you will need depends less on the elevator itself and more on the structural work each system requires.
Traditional cable and hydraulic elevators need a hoistway, a pit below the lowest landing, and often a separate machine room for the drive components. Together, these typically require 20 to 25 square feet of floor space per level.
Pneumatic vacuum elevators do not need any of that. The elevator is a self-supporting cylinder that stands freely between floors. It rests on the lowest landing rather than a pit, and the drive components sit on top of the unit, so no machine room is required. This drops the footprint to as little as 7 to 9 square feet.
That is the single biggest planning decision: whether you have room for full elevator construction, or whether you need a system that skips it.
| Factor | Pneumatic / Vacuum | Hydraulic | Corner | In-Line Drive (MRL) |
| Minimum floor space | 7 to 9 sq ft (circular) | 20 to 25 sq ft | 12 to 16 sq ft | 15 to 20 sq ft |
| Pit required? | No | Yes, 8″ minimum | Yes, 8″ minimum | Yes, 6 to 12″ |
| Machine room required? | No | Yes, separate room | No | No (in-shaft) |
| Shaft required? | No, self-supporting | Yes | Yes | Yes |
| Overhead clearance | 80″ above top landing | 92″+ | 80 to 90″ | 80 to 90″ |
| Min cab size | 30″ dia (PVE30) to 52″ dia (PVE52) | 36″ x 48″ typical | 36″ x 36″ typical | 36″ x 48″ typical |
| Wall mounting needed? | No | Yes | Corner walls | Yes |
| Best for | Existing homes, tight spaces, retrofits | New construction, higher weight capacity | Homes with corner alcoves | Mid-range existing homes |
Before contacting a dealer, take these measurements. Having them ready will narrow down which systems fit your home and speed up the site assessment.
New construction gives you the most flexibility. Any system will fit because the elevator can be planned into the floor plan from the start. Your architect and installer can coordinate the shaft, pit, machine room, and overhead clearance around the system you choose.
Retrofit is more constrained. You are working within existing walls, floors, and structural framing. Traditional systems often require significant construction: cutting a shaft through finished floors, pouring a pit, and building a machine room. Pneumatic vacuum elevators are the most common retrofit choice because they require none of that. In most retrofit installs, the only construction is a single opening cut in the ceiling between floors.
If your home has an open staircase, an unused closet stack, or a corner alcove near where you want the elevator, those are often the best retrofit locations because they minimize structural changes.
The elevator itself is only part of the footprint. You also need clearance around it for daily use.
Wheelchair accessibility requires more space than a single-passenger elevator. Plan for:
Among pneumatic models, the PVE52 is the option that accommodates a wheelchair user. Its 52 inch exterior diameter and 45 inch interior provide enough space to enter and exit comfortably.
Pneumatic elevators use air pressure to move the cab, so they do not need cables, pulleys, hydraulic pistons, a shaft, a pit, or a machine room. The elevator is a self-supporting tube that stands between floors.
Footprints start at a 30 inch exterior diameter for the smallest single-passenger model (PVE30) and go up to 52 inches for the wheelchair-accessible model. Because there is no shaft or pit, pneumatic elevators are the most flexible choice for retrofits and homes with limited space. Pneumatic elevators can serve two to five floors.
Hydraulic elevators are typically built for higher weight capacities and new construction. They use a fluid-driven piston, which requires a separate machine room, a constructed shaft, and a pit of at least 8 inches. Minimum floor space runs 20 to 25 square feet.
Hydraulic systems are generally better suited to homes being built from the ground up because the shaft, pit, and machine room can be planned into the design.
MRL stands for machine-room-less. These systems place the drive components inside the shaft rather than in a separate room, which saves space compared to hydraulic. They still need a constructed shaft with guide rails, a pit of 6 to 12 inches, and 80 to 90 inches of overhead clearance. Floor space typically falls between 15 and 20 square feet.
Corner elevators are designed to fit into the corner of a room, using two adjacent walls as part of the structure. They typically need 12 to 16 square feet of floor space and are limited to lower weight capacity and shorter travel heights than traditional systems. They can be a practical option in homes with a suitable corner alcove but no room for a full shaft.
Space and budget usually influence each other. A retrofit that requires cutting a shaft, pouring a pit, and building a machine room can add tens of thousands of dollars in construction cost on top of the elevator itself. A pneumatic install skips most of that, which is often the difference between the project being feasible and not.
Most home elevators require between 7 and 25 square feet of floor space, depending on the system. Pneumatic vacuum elevators require the least (as little as 7 to 9 square feet) because they do not need a shaft, pit, or machine room. Traditional hydraulic and cable systems sit at the high end because of the additional structural work.
The smallest residential elevators are compact single-passenger models with an exterior footprint of about 30 inches (approximately 7 square feet). By comparison, standard residential elevator cabs are often around 3 feet by 4 feet. These small units are practical for homes with very limited space, but they cannot accommodate a wheelchair or more than one person. For multiple passengers or wheelchair access, plan for at least 20 square feet.
A wheelchair-accessible residential elevator generally needs a cab size of at least 48 inches wide by 60 inches deep, with a door width of 32 to 36 inches. Also plan for clear approach and turning space at each landing.
No. Pneumatic vacuum elevators are pit-less by design and rest directly on the lowest landing. Hydraulic and cable systems typically require a pit of at least 8 inches. If digging a pit is not possible in your home (for example, if the lowest landing sits on a concrete slab), a pit-less pneumatic elevator is your best option.
Most residential elevators require 80 to 100 inches of clearance above the top landing. Pneumatic and MRL systems generally need 80 to 90 inches. Hydraulic systems typically require 92 inches or more.
Yes, most homes can accommodate at least one type of residential elevator. Pneumatic vacuum elevators are the most common retrofit choice because they do not require a shaft, pit, or machine room. In most retrofits, the only construction is a single opening cut in the ceiling between floors.
The cost of a lift can vary widely depending on the type and specifications. If you’re considering installing a home elevator, you’re probably curious about the associated costs.
Let’s delve into the financial aspects of home elevators, focusing particularly on pneumatic lifts.

Home elevators are becoming increasingly popular. They offer convenience, enhance accessibility, and add value to your home. For individuals with mobility issues, a home elevator can be a game-changer.
However, the cost of a lift can be a significant investment.
There are several types of home elevators available, each with different costs. These include traditional hydraulic elevators, cable-driven elevators, and pneumatic elevators.
While each type has its advantages, our focus here is on pneumatic elevators.
A pneumatic elevator, often referred to as a vacuum elevator, uses air pressure to move the cab up and down.
Unlike traditional elevators, pneumatic elevators don’t require a machine room or a deep pit, making them easier and cheaper to install.
| Configuration | Installed Cost |
|---|---|
| Standard 2-floor, entry model | $35,000 – $50,000+ |
| Mid-range 2–3 floor | $45,000 – $70,000+ |
| Premium / multi-floor / custom | $70,000 – $100,000+ |
This blog covers pneumatic elevator costs specifically. For a broader look at all residential elevator types and pricing, the complete home elevator cost guide covers hydraulic, traction, and vacuum systems side by side.
Several factors can influence the cost of a pneumatic lift:
Beyond the initial installation, consider the ongoing maintenance and operating costs.
Pneumatic elevators tend to have lower maintenance costs because they have fewer moving parts and don’t require lubrication, making single-passenger models like the PVE30 a practical choice for residential use.
You should budget for annual maintenance checks, which typically cost between $300 and $600. This ensures your lift remains in good working condition and can prevent costly repairs down the line.
Pneumatic elevators are also energy-efficient. They use minimal electricity compared to traditional elevators, which can lead to savings on your utility bills.
Let’s look at some real-life examples of homeowners who installed pneumatic lifts and their experiences with costs.
The Smith family installed a pneumatic lift in their two-story home. The total cost, including installation, was $30,000+. They opted for a basic model with standard finishes. The installation process was quick and required minimal modifications to their home.
The Johnsons, who have a three-story house, chose a high-end pneumatic lift with custom finishes. Their total expenditure was $45,000+.
Despite the higher cost, they were pleased with the smooth operation and low maintenance requirements.
One of the biggest advantages of pneumatic lifts is their space-saving design.
They don’t require a machine room or a large shaft, making them ideal for homes with limited space, especially space-saving residential elevators like the PVE37.
The installation process for pneumatic lifts is generally quicker than that of traditional elevators. This means less disruption to your home life.
Pneumatic lifts are equipped with numerous safety features, including emergency brakes and backup systems. This ensures safe operation even in the event of a power outage.
While there are many advantages, it’s important to consider the potential drawbacks.
Pneumatic lifts use air pressure to operate, giving them a unique, modern system that’s different from traditional elevators.
However, advancements in technology are helping to reduce noise levels.
Pneumatic vacuum elevators are perfect for homes, handling lighter loads while saving space and adding a modern touch.
This might be a consideration if you need to transport heavy items or require a higher-capacity residential elevator such as the PVE52.
When deciding whether a pneumatic lift is right for you, consider both the initial cost and the long-term benefits.
Think about your specific needs, budget, and the layout of your home.
To fully appreciate the cost of a lift, it’s important to understand the technical aspects of pneumatic elevators. Let’s delve into the mechanics, installation process, and specifications that impact their cost and performance.
Pneumatic lifts operate on the principle of air pressure. Here’s a breakdown of their operation:
Understanding the specifications of pneumatic lifts can help clarify why they might cost what they do. Here are some key specifications:
| Specification | Detail |
|---|---|
| Weight Capacity | Typically 350 – 525 pounds |
| Travel Height | Up to 50 feet (approximately 4-5 stops) |
| Cab Dimensions | Diameter around 30 inches |
| Speed | Approximately 20-30 feet per minute |
| Power Requirements | Standard 220V single-phase power |
The installation process of a pneumatic lift is relatively straightforward compared to traditional elevators. Here’s an overview:
Pneumatic lifts are designed to be durable and long-lasting. With proper maintenance, they can function efficiently for many years. Key components like the vacuum pump and the sealed tube are built to withstand regular use.
Safety is a critical aspect of pneumatic lifts. They must comply with stringent safety standards and regulations, such as ASME A17.7/CSA B44.7 in North America. These standards ensure that lifts are safe for home use and include features like emergency brakes, backup power systems, and regular maintenance protocols.
As technology advances, pneumatic lifts can be upgraded with newer components. This might include more efficient vacuum pumps, quieter operation systems, and advanced control interfaces. These upgrades can extend the life of your lift and enhance its performance.
Pneumatic lifts are also environmentally friendly compared to traditional hydraulic lifts, which use oil and can pose environmental hazards if leaks occur. The use of air pressure eliminates the need for harmful fluids, and its energy-efficient operation reduces overall power consumption.
When considering the cost of a pneumatic lift, it’s essential to conduct a cost-benefit analysis. While the upfront cost might be significant, the long-term benefits such as increased home value, enhanced accessibility, and reduced maintenance costs can outweigh the initial investment.
The Martinez family installed a pneumatic lift in their three-story home. They spent $35,000 on a mid-range model with custom finishes. The lift not only improved accessibility for an elderly family member but also increased the home’s market value by approximately $50,000, making it a wise investment.
The Andersons chose a basic pneumatic lift for their two-story vacation home. The total cost was $28,000, and the lift has significantly improved their ability to move between floors, particularly when carrying luggage and supplies. The lift’s energy-efficient design also helps them save on utility bills.
The cost of a home elevator ultimately depends on your space, layout, and the level of customization you need. Pneumatic lifts stand out for their simpler installation, minimal construction requirements, and lower long-term maintenance, making them a practical choice for many residential settings.
If you’re evaluating what works best for your space and budget, getting clarity on the right configuration early can make the entire process smoother. Get in touch with our team to discuss your requirements and find the vacuum elevator solution that fits your home.
Most homeowners spend between $35,000 and $100,000+ installed, with an average around $45,000 for a standard 2-floor configuration. Cost varies by model, number of stops, and customization.
The unit cost is comparable, but pneumatic elevators typically cost less overall because they require no pit, no machine room, and no shaft construction. Installation is also 2 to 3 days versus 1 to 2 weeks for hydraulic systems.
The cost of a home elevator depends on the type of lift, number of stops, installation complexity, customization, and the materials used. Additional features like energy-efficient systems or advanced safety features can increase the price.
Yes, while the initial home elevator cost can be significant, pneumatic lifts typically have lower maintenance and energy costs over time, making them a cost-effective option in the long run.
With proper maintenance, a pneumatic vacuum elevator can operate efficiently for 20 years or more. Seals typically need replacement every 4 to 5 years or after approximately 15,000 rides.
Yes. A residential elevator expands your buyer pool and adds a functional premium to the property, particularly in markets with aging homeowners. For more on this, the guide on whether home elevators increase property value covers the data in detail.
The PVE30 is the most compact and lowest-cost model, designed for single-passenger use in homes with limited space.
Yes. PVE offers a pay-as-you-go program, and homeowners can also use home improvement loans, HELOCs, or dealer financing plans.
Suppose you think that purchasing an elevator and fitting it into any space is the only work required to enjoy the luxury of the elevator. Then, it is wrong. A great deal of planning and work goes into installing a home elevator. Have you considered your new elevator’s standard components? If not, then, at that point, ensure that you know all about standard home lift dimensions before requiring a statement. If you don’t have enough room in that frame of mind to oblige the standard lift aspects, you might have to consider different possible outcomes.
From general elevators for two-story houses to multi-floor lifts, find out how to determine the proper home lift dimensions that prove fruitful for you. Introducing a specially fit lift can convey an inward feeling of harmony that your home will stay your home long into the future, regardless of what life throws your way.
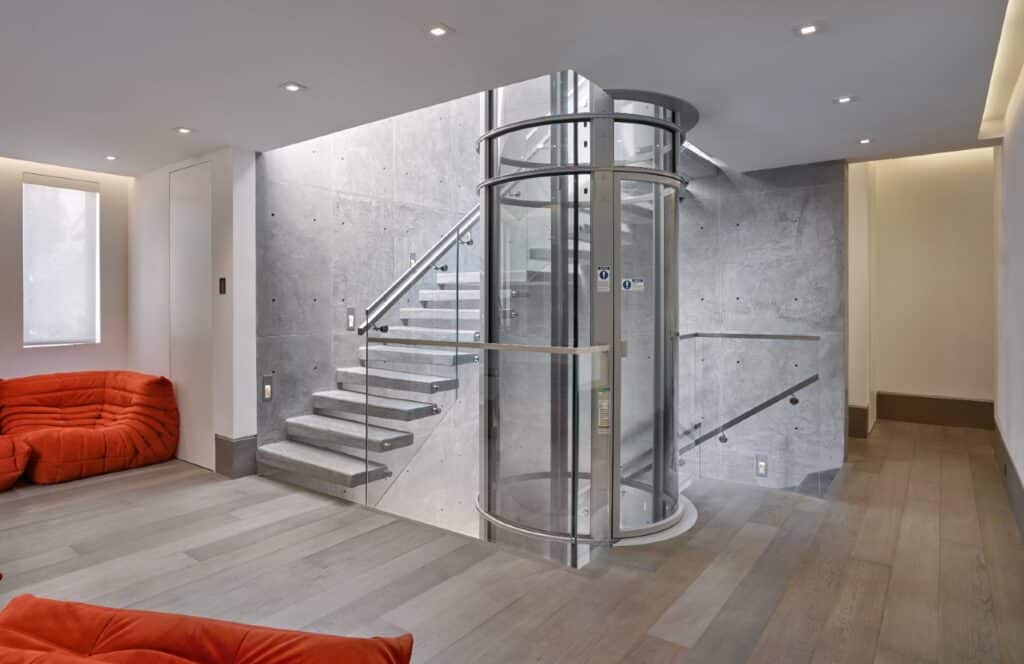
As a rule, you want at least 20 to 25 square feet of room to install a home lift. Depending on the elevator design you intend to utilize, you could require around 8 inches of pit space to dive into the ground underneath the lift. The smallest home lift is usually a pneumatic vacuum lift, which is “pit-less” by design and hence requires less space for installation.
Standard private lift cabins usually measure around 3 feet wide by 4 feet down, which requires a hoistway measuring at least 4 feet wide and 5 feet down. A few more modest home lift dimensions measure only 3 feet by 3 feet, around 9 feet square, yet plans this small might not easily accommodate a wheelchair or numerous individuals.
The most important thing before installing an elevator is to have the ideal size that fits your space accurately. A couple of things influence how much space you want for your private lift. The kind of lift you need matters, and the requirements of your home plan might help you figure out where you should put a home lift. A couple of interesting points while concluding how much space you truly need following the home lift dimensions include:
You might require space for an outside electrical framework and drive parts that power your home lift. These parts are crucial for installing any home lift. A few home lifts have a drive framework mounted in the hoistway, limiting the essential space outside the shaft. Different lifts require an outer machine space for the drive. If you have less space, consider the compact design models of Pneumatic Vacuum Elevators (PVE), which have the best performance with enhanced features.
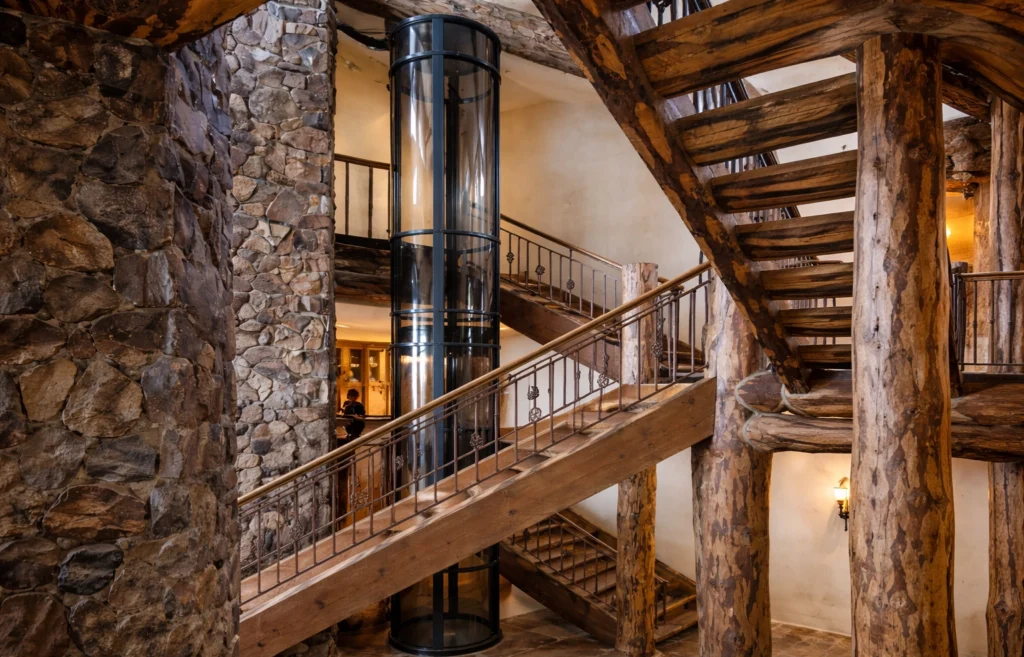
A home lift regularly utilizes a rail framework joined to a wall, so the width of the wall matters when determining whether you have sufficient room. Having 30 square feet of accessible space probably won’t be sufficient if you don’t have a sufficiently wide wall to snare the rail onto. Moreover, many other types of elevator rooms are also situated with some walls, which also impact the home lift dimensions.
Some home lifts frequently have entryways measuring 36 inches wide to accommodate a wheelchair, although a few more modest models might have entryways as narrow as 21 inches wide.
The space is taken up by the actual lift cabin, the lift lodging, and the components that make the lift run appropriately need running clearance and space around the border of the elevator. There ought to be sufficient space for the ways to open accurately and for travelers to get onto the lift and land at each level. You likewise need enough space over the lift. Many models expect somewhere around 6 inches above clearance over the highest point of the lift. Nearby building regulations might indicate a specific measure of space at the top or sides, so you also want to consider those necessities.
Most private lifts are planned with a shaft length of 25 to 50 feet, so moving between a few stories is conceivable with a more modest home lift. If your home incorporates several levels, you could require a bigger lift with a longer shaft. Make sure to count completed cellars and loft space as a level in the event that you believe the lift should go that far.
The weight limit of your lift might restrict the number of individuals or the gear you can bring into the elevator cabin. If you intend to move heavier things (1,000 lbs.) between floors, consider whether you want a bigger lift with a more extreme weight limit. Bigger lifts also have variations in dimensions, which should be considered when purchasing and installing a home lift.
For existing homes attempting to retrofit, you could likewise have to overhaul part of your electrical framework to oblige the home lift dimensions. You want adequate room behind the walls to course new electrical wires.
Sometimes, introducing a home lift implies rerouting other frameworks in your home, such as an air conditioning system or water pipes in your walls. When considering space necessities for your home lift, you want to consider these progressions and where you intend to move ventilation work or plumbing.
Before contacting a dealer or requesting a quote, take these measurements and note them down. Having this information ready will significantly speed up the site assessment.
Availability considerations have driven the development of lift size guidelines. Meeting wheelchair and cot access prerequisites requires cautious choice, particularly concerning home lift dimensions and designs.
Lift models consistent with ADAAG guidelines offer different floor sizes and inside cabin levels, taking care of assorted accessibility needs. Lift door width and height can likewise be custom-made to suit explicit requirements according to every user.
Home lifts can fit inside shaft dimensions ranging from 5 feet by 4 feet to 5 feet by 7 feet, with a typical shaft length of 50 feet. While most homes comfortably accommodate lifts with three to four stops, taller structures may require larger machines. For a detailed comparison of how different residential elevator space requirements vary by lift type, including hydraulic, corner, and in-line drive systems, that break down covers minimum and maximum constraints side by side.
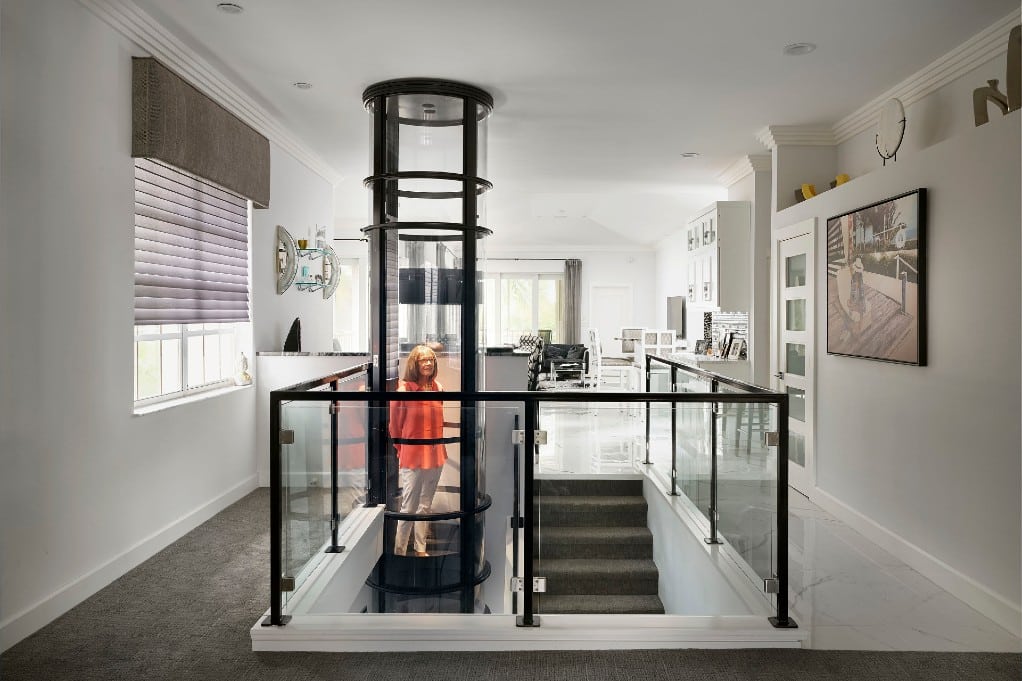
Pneumatic Vacuum Lifts (PVE) present a setup of imaginative lift arrangements custom-fitted to address different issues while sticking to exact aspects for ideal execution and usefulness. PVE offers models of pneumatic vacuum home elevators with excellent and precise dimensions for optimal working:
| Models | Exterior Diameter | Floor Stops | Weight Capacity | Passengers |
| PVE 30 | 750 mm | 2-5 floors | 350 pounds | single passengers |
| PVE 37 | 933 mm | 2-5 floors | 450 pounds | Two passengers |
| PVE 52 | 1316 mm | 2-5 floors | 525 pounds | Two to three passengers |
| THE CUBE | 1316 mm | 2 floors | 450 pounds | Two passengers |
Whether you’re searching for a reduced arrangement like the PVE30 for restricted space, an adaptable choice like the PVE37 for two travelers, an open and wheelchair-accessible PVE52, or a reasonable and unique The Cube, PVE has a model that suits your necessities. These are pragmatic and increase the value of your home by improving accessibility and comfort in moving around your home.
Once you’ve confirmed your measurements fit one of these models, the next useful step is understanding what a home elevator costs to purchase and install so you can budget for the full project before requesting a quote.
The standard size of a private lift is commonly 36 inches (3 feet) wide and 48 inches (4 feet) deep. However, dimensions might change in light of explicit models and customization choices of home lifts.
A home lift is expected to take up roughly 20 square feet or less, with shaft space normally occupying around 5 square feet. Pneumatic home elevators require less space because of their pit-less framework.
Depending on the model framework, a single lift normally measures 36 to 48 inches wide and 48 to 60 inches down. These dimensions give adequate space to single travelers or restricted portability gadgets.
The space required differs by the type of home lift. Pneumatic lifts are intended to be minimized and squeezed into more modest spaces, while traction lifts require more space for their machine room and shaft. If you have restricted space, a compact model like PVE30 may be the best decision.
The minimum dimensions for the elevator cab are around 36″ wide x 48″ deep, with maximums surpassing 60″ x 72″. The minimum door dimensions are around 32″ wide, with maximums surpassing 48″ for more extensive access. Lastly, the minimum dimensions for the Shaft are around 5′ x 5′ (25 square feet), with bigger spaces offering greater adaptability and solace.
Passenger lifts usually measure 1100–1600 mm wide and 1400–1600 mm deep, accommodating 6–13 people. Residential lifts are smaller, around 900–1100 mm wide and 900–1300 mm deep for 2–4 passengers. Cargo elevators are larger, with widths of 1500–2500 mm and depths of 2000–3500 mm.
Residential elevators usually need 90–100 inches of overhead clearance above the top floor. Standard cab sizes are around 36″ × 48″, with a maximum of 18 sq. ft. under ASME A17.1. For accessibility, a 36-inch door width is recommended. Traditional systems may need a separate machine room, while MRL elevators place equipment inside the shaft to save space.
Most home elevators require between 12 and 25 square feet of floor space, depending on the elevator type, number of floors, and how the system is installed. Pneumatic vacuum elevators are typically designed with a much smaller overall footprint, as little as 7 to 9 square feet, because they don’t need a machine room, elevator shaft, or pit.
This guide covers standard residential elevator dimensions, cab size and shaft space requirements, pit depth, overhead clearance, and how to determine the final size that fits your home.
The space needed for a home elevator depends on the system you choose. A residential elevator requires room for the cab itself, entry clearance at each landing, and, for traditional systems, a hoist way, pit, and sometimes a separate elevator machine room.
Most residential elevators require a minimum of 5 feet by 5 feet (25 square feet) of floor space for the shaft and cab combined. Compact models can work in smaller areas. Pneumatic elevators, for example, rest on the existing ground floor and require no shaft construction, which means they can often be installed where there isn’t enough space or ample room for a traditional system.
Standard residential elevator cab dimensions are approximately 36 inches wide by 48 inches deep, housed inside a hoistway of at least 4 feet by 5 feet. Smaller cabs — around 36 by 36 inches — exist but may not comfortably accommodate a wheelchair user or multiple passengers.
The total available space in your home, including clearance around the elevator and room for door swing, determines which elevator models will fit.
Not all residential elevators require the same amount of space. The table below compares the four main elevator types across key dimensions so you can quickly identify which systems fit your available space.
| Space Factor | Pneumatic / Vacuum | Hydraulic | Shaftless / Platform | MRL (Machine-Room-Less) |
| Minimum floor space | 7–9 sq ft (circular) | 20–25 sq ft | 12–16 sq ft | 15–20 sq ft |
| Pit required? | No (pit-less) | Yes, 8″ minimum | Yes, 6–8″ | Yes, 6–12″ |
| Machine room required? | No | Yes, separate room | No | No (in-shaft) |
| Shaft / hoistway required? | No — self-supporting tube | Yes | Yes | Yes |
| Overhead clearance | 80″ above top floor | 92″+ | 80–90″ | 80–90″ |
| Minimum cab size | 30″ diameter (PVE30) | 36″ × 48″ typical | 36″ × 36″ typical | 36″ × 48″ typical |
| Guide rails / wall mounting | No | Yes, with guide rails | Corner walls | Yes, with guide rails |
| Best for | Existing homes, retrofits, tight spaces | New construction, high load capacity | Corner alcoves, small homes | Mid-range retrofits |
Pneumatic elevators require a footprint between 30 and 52 inches wide, depending on the model. They operate using air pressure rather than cables, pulleys, or hydraulic pistons, which eliminates the need for an elevator machine room, elevator shaft, or pit.
Because the system is self-supporting, it doesn’t require guide rails or load-bearing walls for mounting. This makes pneumatic elevators one of the most space-efficient options for most homeowners, particularly those retrofitting an elevator into an existing home where there isn’t much space to work with.
These systems can serve two to five floors with a maximum travel height of 50 feet, which covers most residential settings including homes up to six story homes in certain configurations.
Hydraulic elevators are typically designed for new construction and higher weight capacity applications. They use a fluid-driven piston system and require a dedicated elevator machine room, a constructed elevator shaft, and a pit depth of at least 8 inches.
The minimum floor space is around 20 to 25 square feet. These systems use guide rails mounted to the shaft walls to keep the cab aligned during travel. Because of the additional space needed for the machine room and shaft, hydraulic elevators are generally better suited for homes being built from the ground up where the elevator can be planned into existing floor plans from the start.
MRL elevators place the drive system inside the shaft itself, eliminating the need for a separate machine room. This saves additional space compared to hydraulic systems while still offering strong load capacity and smooth operation.
They still require a constructed shaft with guide rails, a pit (typically 6 to 12 inches), and overhead clearance of 80 to 90 inches. Floor space requirements vary depending on the model but generally fall between 15 and 20 square feet.
Shaftless elevators and platform lifts are typically designed for homes with limited space where a full shaft isn’t feasible. These systems travel on a track and can often fit into corner alcoves or along walls. They require less floor space — around 12 to 16 square feet — but are usually limited to two floors and lower weight capacity.
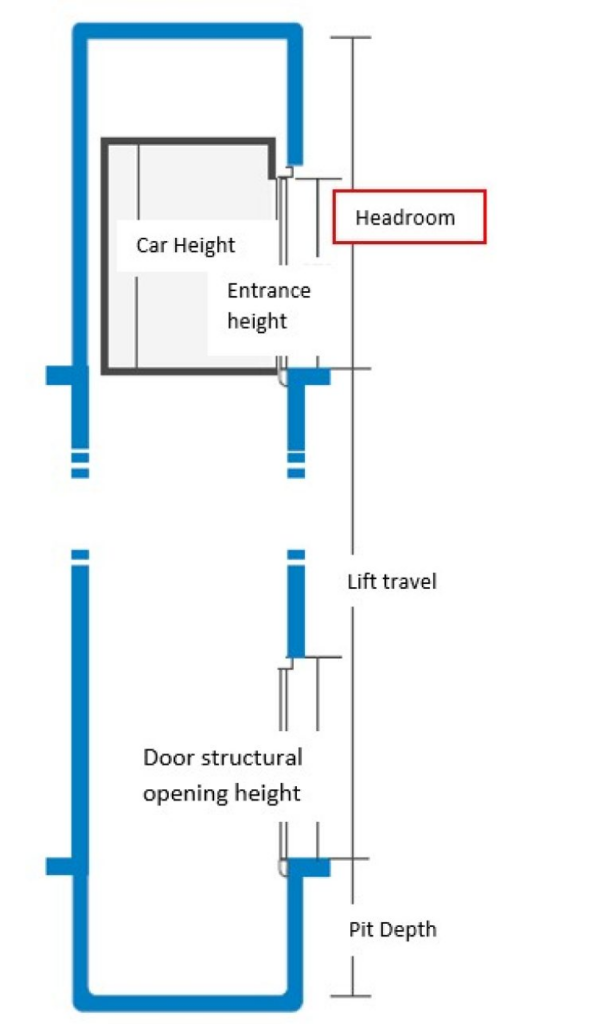
Understanding the relationship between cab dimensions and shaft space is essential for planning. Typical elevator dimensions vary depending on the system, but standard elevator dimensions for residential use follow established guidelines. The cab is the interior space passengers ride in, while the elevator shaft (or hoistway) is the surrounding structure that houses the cab, guide rails, and mechanical components.
Standard residential elevator dimensions follow the ANSI A17.1 standard, which sets minimum cab sizes based on how many people the elevator needs to accommodate:
The final size you choose should factor in how many people will use the elevator regularly, whether anyone needs wheelchair access, and whether you plan to transport items like groceries, luggage, or mobility aids between floors.
Residential elevators typically require a hoistway footprint of 5′ x 5′ for traditional systems. The shaft must provide enough room around the cab for guide rails, safety mechanisms, and clearance during travel.
General guidelines for shaft space:
For pneumatic elevators, no traditional shaft is needed. The self-supporting tube serves as both the shaft and the cab enclosure, which dramatically reduces the overall footprint and eliminates construction work for shaft walls.
A standard door opening for elevators is usually 32 to 36 inches wide. A standard elevator door width is about 36 inches for full accessibility. Local building codes in most areas mandate a minimum doorway width of 32 inches.
The main door types for residential elevators are:
Your door choice affects both the cab size and the amount of floor space needed at each landing for safe entry and exit.
Pit depth varies depending on the elevator type:
If your home doesn’t allow for digging a pit — for example, if the ground floor is a concrete slab — pit-less pneumatic models are your best option.
Overhead clearance is the distance from the finished top floor to the ceiling or roof structure above. Overhead clearance of 8 to 10 feet is required above the highest landing for most residential elevators. Hydraulic systems typically need 92 inches or more, while pneumatic and MRL elevators generally require 80 to 90 inches.
Pneumatic Vacuum Elevators (PVE) offers four elevator models, each typically designed for different capacity and space needs. All models operate without a machine room, shaft, pit, or guide rails.
| Specification | PVE30 | PVE37 | PVE52 | The Cube |
|---|---|---|---|---|
| Exterior diameter | 750mm (30″) | 933mm (37″) | 1316mm (52″) | 1316mm (52″) |
| Interior diameter | 521mm (20.5″) | 813mm (32″) | 1150mm (45.3″) | — |
| Standard door width | 534mm (21″) | 534mm (21″) | Wider options available | — |
| Floor stops | 2–5 | 2–5 | 2–5 | 2 |
| Weight capacity | 350 lbs (159 kg) | 450 lbs (205 kg) | 525 lbs (238 kg) | 450 lbs (205 kg) |
| Passengers | 1 | 2 | 2–3 | 2 |
| Wheelchair accessible | No | No | Yes | No |
| Pit required | No | No | No | No |
| Machine room | No | No | No | No |
Residential elevators typically have a weight capacity of 750 to 1,000 pounds for traditional systems. PVE models are designed for residential use with lower weight capacities that accommodate typical household needs: one to three passengers per trip.

Choosing the right elevator size depends on your primary use case:
PVE offers custom options including transparent or opaque cabins, different door styles, interior finishes, and customization options to match your home’s design. These design options let most homeowners personalize the elevator to blend with their existing decor.
Before contacting a dealer or requesting a quote, take these measurements. Having this information ready will help determine which elevator models fit your home and will speed up the site assessment.
New build: If you’re building a new home, you have the most flexibility. The elevator can be planned into existing floor plans from the start, with the shaft location, pit depth, and overhead clearance designed around the system you choose. Your architect and elevator installer can coordinate early to ensure enough space is allocated without compromising the home’s layout.
Retrofit: Installing an elevator in an existing home is more constrained. You’ll need to work within the available space, check structural integrity for shaft support, and potentially reroute HVAC or plumbing. Pneumatic elevators are the most popular choice for retrofits because they don’t require shaft construction, a pit, or a machine room. Home installation can occur through existing floor openings with minimal structural impact.
In either case, consult with a qualified elevator professional early in the process. They can assess your home’s structure and recommend the best placement and elevator size for your situation.
The best placement depends on your home’s layout, available space, and how the elevator integrates with daily traffic flow. Here are the most common locations:
A staircase already connects your floors and sits in a location your architect chose for optimal flow. Installing an elevator adjacent to the staircase takes advantage of this, as it provides access to all floors without disrupting the home’s layout. Many pneumatic elevators are installed in the center of a spiral staircase, using space that would otherwise go unused.
Stacked closets can sometimes be converted into an elevator shaft for traditional systems. This approach uses space that’s already allocated in existing floor plans and minimizes the impact on room layouts. Pneumatic models can fit into even smaller alcoves since they don’t require shaft construction.
The garage is a practical location for homeowners who want easy access from their car to upper floors. It’s especially useful for transporting heavy items. Keep in mind that the space above your garage must be suitable for the elevator to reach, and that garage installations may need materials that withstand temperature variation.
Self-supporting elevator models, including pneumatic elevators, can be placed in the center of a room rather than against a wall. This gives most homeowners greater flexibility in layout and design, and the transparent cab can become a design element rather than a hidden feature.
Residential elevators must comply with several codes and standards that directly affect dimensions:
ASME A17.1 / A17.7: Sets safety and performance standards for residential elevators. Under this code, residential elevator cabs are limited to a maximum of 18 square feet. Most PVE elevators are A17.7 code compliant.
Local building codes: Requirements vary depending on your area and may specify minimum door width, pit depth, overhead clearance, and fire ratings for elevator doors. Always check with your local building department before installation. Local building codes may also dictate minimum shaft space and structural requirements for load bearing walls.
ADA and Accessibility: ADA guidelines suggest elevator cab sizes of at least 48″ W x 60″ D for wheelchair access, with a door width of at least 36 inches. Note that PVE residential elevators are designed as residential elevators and are not ADA compliant — they follow the A17.7 residential code. However, the PVE52 model does accommodate wheelchair users within its residential classification.
Fire Code: Elevator doors in a residential setting must typically be self-closing and may need to be fire-rated depending on local requirements. Consult local building codes for specifics.
Work through these questions to determine the best elevator size for your home:
The right elevator size balances your space constraints, mobility needs, and budget. When in doubt, choose a slightly larger cab. It’s much easier to install a bigger elevator during construction than to upgrade later.
Most residential elevators require at least 5 feet by 5 feet (25 square feet) of floor space for the shaft and cab. Pneumatic vacuum elevators need much less — as little as 7 to 9 square feet — because they don’t require a shaft, pit, or machine room.
Standard residential elevator dimensions include 36 inches wide and 48 inches deep for a single-occupant cab. These are the most common home elevator dimensions across the industry. Wheelchair-accessible cabs should be at least 48 inches wide by 60 inches deep. The maximum cab size allowed under ASME A17.1 is 18 square feet.
No. Pneumatic vacuum elevators are pit-less by design and rest directly on the existing ground floor. Traditional hydraulic and cable elevators typically require a pit depth of 8 inches. If you can’t dig a pit, pneumatic models are the best option.
Wheelchair-accessible residential elevators typically require a cab depth of at least 51 inches and a width of at least 48 inches. The door opening should be 32 to 36 inches wide. The PVE52 is the only pneumatic model that accommodates wheelchair users, with an interior diameter of 45.3 inches.
Overhead clearance of 8 to 10 feet is required above the highest landing for most residential elevators. Pneumatic and MRL elevators generally need 80 to 90 inches, while hydraulic systems require 92 inches or more.
Yes. Retrofit installations are common, though your options depend on available space, structural support, and how many floors you need to connect. Pneumatic elevators are the most popular retrofit choice because they need no shaft construction, no pit, and no machine room. They can often be installed in a day with minimal disruption.
A standard door opening for elevators is usually 32 to 36 inches wide. For full wheelchair access, a 36-inch door is recommended. Some compact elevator models have doors as narrow as 21 inches, but these don’t accommodate wheelchairs or mobility aids.
Different drive systems need different amounts of space. Hydraulic elevators require the most room — including a separate elevator machine room. MRL elevators place the drive inside the shaft, saving additional space. Pneumatic elevators need no machine room at all, making them the most space-efficient option for most homes.
The right residential elevator starts with accurate measurements and a clear understanding of how much space each system requires. Whether you’re planning a new build or retrofitting an existing home, knowing your available footprint, overhead clearance, and pit options will narrow down which elevator types and models fit.
Pneumatic vacuum elevators offer the smallest footprint of any residential system, no shaft, no pit, no machine room, making them the most practical choice for homes where space is limited. With models ranging from the compact PVE30 to the wheelchair-accessible PVE52, there’s an option for nearly every layout and mobility need.
Ready to find out which model fits your home? Contact our team for a free consultation and an elevator specialist can walk you through your options based on your specific measurements and needs.
Quick Answer: A residential dumbwaiter typically costs between $3,000 and $20,000+ installed, depending on the system type, number of stops, weight capacity, and installation complexity. Manual dumbwaiters sit at the low end of that range, while electric models with custom finishes or multi-stop retrofits reach the higher end. Commercial-grade dumbwaiters run $25,000 to $50,000+.
Thinking about adding a dumbwaiter to your home? A dumbwaiter can reduce repeated trips between floors by moving groceries, laundry, and other household items more efficiently, especially in multi-level homes.
Before choosing a system, it is helpful to understand the costs involved. Dumbwaiter pricing can vary based on lift type, travel distance, installation complexity, and whether the system is added during new construction or retrofitted into an existing home.
This guide explains the main factors that affect dumbwaiter cost, typical price ranges, and what homeowners should consider when budgeting for installation. By the end, you will have a clearer understanding of whether a dumbwaiter is the right fit for your home and project goals.
A dumbwaiter is a small motorized or manual lift designed to transport items between floors of a home or building. It operates inside a shaft using either a rope-and-pulley system or an electric motor.
Unlike a home elevator, a dumbwaiter is built for goods only, not passengers. Common uses include moving groceries, laundry, firewood, and meal trays between floors.
A dumbwaiter should never be used to transport people, pets, or mobility devices. If the goal is to move a person safely between floors, a certified residential home elevator is the appropriate solution.
Older dumbwaiters were often simple manual lifts that used ropes, pulleys, and small shafts to move food, dishes, or household items between floors. Modern residential dumbwaiters are typically more refined, with smoother operation, improved controls, enclosed shafts, and safety features designed for regular home use.
Even with these improvements, a dumbwaiter is still designed for household items only. It can help move groceries, laundry, dishes, beverages, or small household supplies between floors, but it should never be used to transport people, pets, or mobility devices.
If your goal is to move a person safely between floors, a certified residential home elevator is the appropriate solution.
Dumbwaiter costs vary based on the type of system, number of stops, weight capacity, installation complexity, and whether the unit is added during new construction or retrofitted into an existing home. Homeowners should request an itemized quote from a qualified installer to understand the full project scope.
The ranges below can be used as general planning estimates, but actual pricing will vary by location, installer, home layout, code requirements, and project details.
| Tier | Type | Installed Cost |
| Low-End | Manual, small capacity, 2 floors | $3,000 – $8,000+ |
| Mid-Range | Electric, standard capacity, 2–3 floors | $8,000 – $12,000+ |
| High-End | Electric, large capacity, custom finish | $13,000 – $20,000+ |
| Commercial | Heavy-duty, multi-stop | $25,000 – $50,000+ |
These estimates are meant to help with early budgeting. Your actual cost will depend on the factors covered in the next section, including equipment type, site preparation, electrical work, permits, and installation requirements.
Residential dumbwaiter cost varies depending on several factors. The main elements that influence the final price:
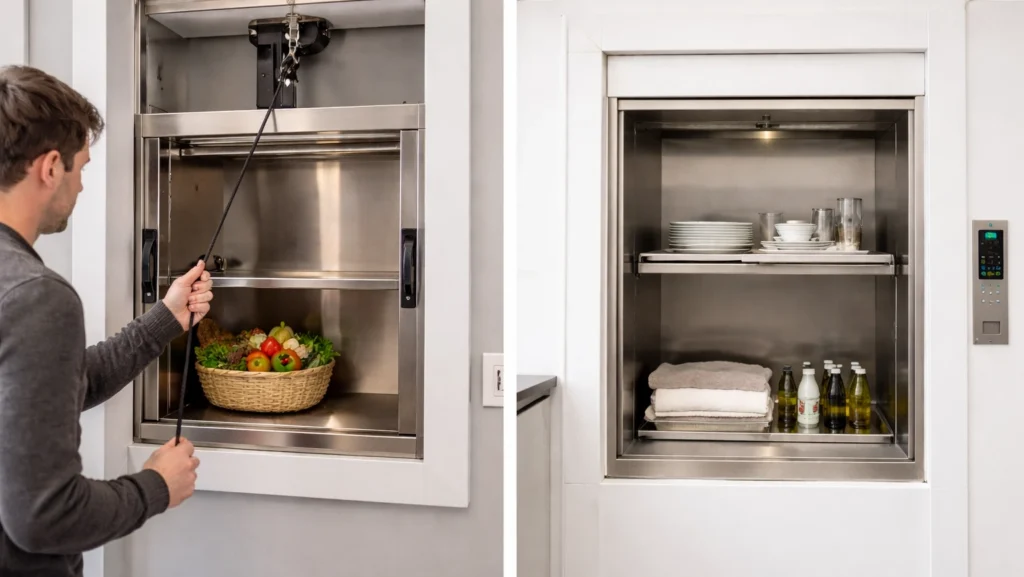
Typical dumbwaiter installation costs include:
Not every dumbwaiter quote includes the same items. Before approving a project, homeowners should ask what is included and whether any additional work may be needed.
Always request a fully itemized quote before signing. This should outline the dumbwaiter unit, labor, electrical work, permits, inspections, and any site preparation needed.
A dumbwaiter can be especially helpful in multi-story homes where household items are frequently carried between floors. It is most useful for homeowners who want to reduce repeated stair trips with heavy, awkward, or breakable items.
A dumbwaiter may make sense for:
Common uses include moving groceries from a garage or entry level to the kitchen, transporting laundry between bedrooms and laundry rooms, carrying meal trays to an upstairs living area, or moving small household supplies between levels.
If you need to move people between floors rather than goods, a residential home elevator is the right solution.
Before choosing a dumbwaiter, define how you plan to use it. Think about what items you want to move, how often, how many floors it needs to serve, and whether a manual or electric model fits better.
Key factors to weigh:
If you need to move people, wheelchair users, pets, or mobility devices between floors, a dumbwaiter is not the right solution. A certified residential home elevator is the appropriate choice.
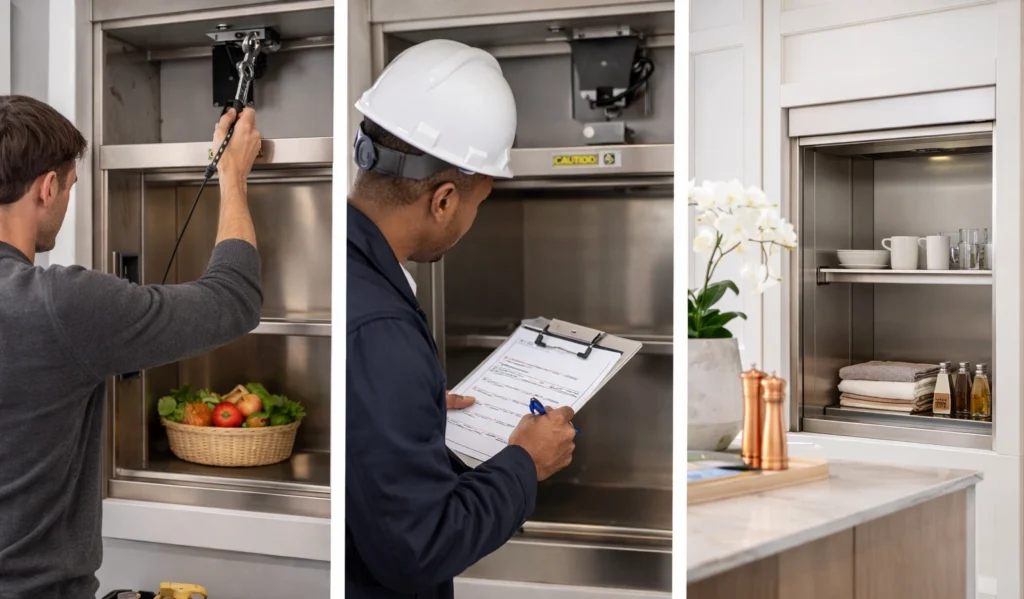
Some homeowners explore financing when adding a dumbwaiter as part of a larger renovation or accessibility project. Available options vary by lender, installer, and project scope.
Common options may include:
Before choosing a financing option, review the full project estimate, including equipment, installation, electrical work, permits, inspections, and any site preparation. Homeowners should also ask whether the installer offers payment options or can provide documentation needed for a lender.
While cost is an important factor, homeowners should also consider how a dumbwaiter can improve daily convenience in a multi-story home.
If you’re considering solutions for transporting items within your home, here’s a quick comparison of dumbwaiters with other options:
| Option | Best For | Limitation |
|---|---|---|
| Dumbwaiter | Transporting items between floors | Cannot carry passengers |
| Stairlift | People with mobility issues navigating stairs | Not for transporting objects |
| Laundry Chute | Moving laundry specifically | Very limited use case |
| Basket Hoist | Occasional heavy lifting | Not a permanent solution |
| Home Elevator | Transporting people and items | Higher cost, more installation work |
Homeowners tight on floor space can also review our popular choices for small residential elevators for compact-footprint options.
A dumbwaiter is a practical choice when the goal is to move items between floors. If the goal is to move people safely, a certified residential home elevator is the appropriate solution. PVE pneumatic vacuum elevators can be a practical option for homeowners who need passenger access but want a compact, self-supporting elevator that requires no traditional shaft, pit, or machine room.
Proper maintenance keeps a dumbwaiter running safely and reliably. Key maintenance items:
A properly installed and maintained dumbwaiter can provide reliable service for moving household items between floors.
A dumbwaiter can be a practical addition to a multi-story home, especially for homeowners who regularly move groceries, laundry, meal trays, firewood, or household supplies between floors. The right system depends on the home layout, number of stops, capacity needs, installation requirements, and local code considerations.
Before choosing a dumbwaiter, request itemized quotes from qualified installers and confirm what is included, such as equipment, labor, electrical work, permits, inspections, and any site preparation. With proper installation and routine maintenance, a dumbwaiter can support everyday convenience for many years.
If you need to move people, wheelchair users, pets, or mobility devices between floors, a dumbwaiter is not the right solution. In that case, a certified residential home elevator is the appropriate option. PVE pneumatic vacuum elevators are compact, self-supporting, and require no traditional shaft, pit, or machine room, making them a practical choice for many homes where accessibility is the priority.
Dumbwaiter cost varies based on the type of system, number of stops, weight capacity, installation complexity, and local code requirements. Manual dumbwaiters are generally simpler, while electric dumbwaiters, custom finishes, and retrofit installations may require more planning. Homeowners should request an itemized quote from a qualified installer.
Dumbwaiter installation time depends on the home layout, whether a shaft or chase already exists, and whether electrical or structural work is needed. A qualified installer can provide a more accurate timeline after reviewing the home and project scope.
In many areas, yes. Dumbwaiter installations may require a building permit and post-installation inspection. Homeowners should confirm local requirements with their installer or local building authority before the project begins.
Electric dumbwaiters use a motor and controls to move items between floors with minimal physical effort. Manual dumbwaiters use a rope-and-pulley system and require more effort to operate. For frequent daily use, an electric dumbwaiter is often the more practical choice.
Dumbwaiters are generally low maintenance, but routine service is still important for safe and reliable operation. Maintenance may include checking controls, doors, moving parts, weight limits, and overall system performance according to the manufacturer’s recommendations.
No. Dumbwaiters are designed to transport items only, not people, pets, wheelchairs, or mobility devices. If you need to move passengers between floors, a certified residential home elevator is the appropriate solution.
A dumbwaiter can be worthwhile for multi-story homes where groceries, laundry, dishes, meal trays, or household supplies are regularly moved between floors. It can improve daily convenience and reduce the need to carry heavy or awkward items up stairs. If you need to move people rather than goods, a residential home elevator is the better option.
Modern dumbwaiters are typically more refined than older manual systems. Many include electric operation, improved controls, enclosed shafts, access doors, and safety features designed for regular residential use. However, they are still designed for items only, not people.