


Installing a home elevator is one of the smartest investments you can make in your property. Whether you’re planning for aging in place, accommodating mobility needs, or simply upgrading your lifestyle.
But before you can enjoy the smooth ride of a pneumatic vacuum elevator, there’s one important step you can’t skip: getting the proper permits.
Navigating home elevator permits may sound overwhelming, but with the right approach and support, it’s a manageable process.
In this guide, we’ll explain why permits matter, how to research your local requirements, what documents to prepare, and how PVE helps you every step of the way.
Unlike plug-and-play appliances, elevators are deeply integrated into your home’s infrastructure.
Even though PVE elevators don’t require a pit, shaft, or machine room, they still involve mechanical components, electrical connections, and structural considerations.
That’s why building departments enforce specific regulations for all residential elevator installation requirements.
Permits exist to protect homeowners and ensure every installation meets local elevator building codes.
These codes address everything from fire safety and access clearance to energy efficiency and emergency braking systems.
If your elevator doesn’t meet these standards—or if it’s installed without proper permits—you may face:
Simply put: securing permits isn’t just a bureaucratic step—it’s a key part of building a safe and reliable system for your home.
Now that you understand the importance of permits, here’s how to begin the process. Requirements will vary depending on your state, city, or county, so research is essential.
Search online for your city or county’s building department. Look for keywords like “residential elevator permit,” “home elevator installation,” or “mechanical permits.” These websites typically list permit types, fees, and required documents.
Not all homes are automatically zoned for elevator installation. Check if residential elevators are allowed in your zoning district and if there are height, size, or usage restrictions. In rare cases, you may need to request a variance.
If you can’t find what you need online—or if the information seems outdated—don’t hesitate to call. Speaking directly with a permit officer can save you time and help clarify exactly which permits and inspections will apply to your project.
Installing a home elevator may require more than one permit. Common types include:
Most homeowners don’t have to manage the permit process alone. Reputable elevator installers—including certified PVE dealers—often handle the paperwork for you or walk you through each step.
They’ll ensure your system is installed in full compliance with local home elevator regulations.
Once you’ve connected with your building department or contractor, it’s time to gather the necessary materials. The more prepared you are, the faster your permit can be processed.
Here’s what you’ll likely need to submit:
HOA approval (if applicable): If you live in a community with a homeowner’s association, you may need written approval before modifications begin.
At Pneumatic Vacuum Elevators, we understand that permits and regulations can feel like a hurdle.
That’s why we make the process as easy as possible. When you choose a PVE-certified installer, you’re working with professionals who already understand your region’s permitting requirements and safety codes.
Our systems are designed for efficiency—not just in performance, but in installation. Because our elevators:
—they’re easier for building officials to approve. Plus, we provide full documentation to assist with your permit application, including system specs, installation manuals, and code compliance certificates.
Whether you’re working with your municipality or HOA, we’re here to help you submit the right paperwork and keep your project moving forward.
Yes. Even if your elevator doesn’t require major construction, a permit ensures that the installation meets all safety and building code standards.
Timelines vary depending on your local municipality. In general, you can expect the permit process to take anywhere from 1 to 4 weeks, depending on the complexity of your project and how busy the permit office is.
Yes. A final inspection is usually required to ensure the elevator is safe, functional, and code-compliant. Your contractor or elevator installer will often schedule this on your behalf.
Permit costs vary by location and may range from $100 to $1,000 depending on the scope of work. Some areas charge a flat fee, while others base it on construction value or elevator type.
No. Performing the work without a permit can result in fines, forced removal of the equipment, and potential liability issues. Always secure your permit first.

Permits might not be the most exciting part of installing a home elevator—but they’re one of the most important. By taking the time to research your local regulations and gather the right documents, you’ll ensure a safe, compliant, and stress-free installation.
At PVE, we’re committed to making the process seamless. Our certified installers are here to guide you through every step—from permit research to final inspection—so you can elevate your home with confidence.
Most homes are not built for the people living in them today. According to Harvard’s Joint Center for Housing Studies, fewer than 4% of U.S. homes have the three basic features needed for accessibility: a step-free entry, a bedroom on the main floor, and a full bathroom on the main floor.
This checklist covers every room, with the specific measurements and specs you need to hand your contractor.
Planning starts with a room-by-room accessible home renovation checklist and a clear list of your specific needs: mobility, vision, strength, cognition. The goal is safe movement, independent daily tasks like bathing, cooking, and transfers, and staying in your home long term. About 75% of adults age 50 and older say they want to remain in their current home as they age, according to AARP’s 2024 Home and Community Preferences Survey, so it’s worth planning renovations early rather than reacting after an injury.
Map your daily routine from front door to bathroom to bedroom to kitchen, and note every barrier: steps, tight doors, hard-to-reach switches, slippery floors. Document current measurements for doorway widths, hallway widths, stair dimensions, bathroom size, counter heights, and turning space (60-inch circles wherever a wheelchair is used).
Involve an occupational therapist or a Certified Aging-in-Place Specialist (CAPS) early. They translate mobility needs into construction specs a contractor can build from, and integrating universal design from the start tends to serve everyone in the household, not just the person the renovation is planned around.
ADA standards guide safety but do not directly regulate private homes unless local code adopts them. Check with your city or county building department. Permits are typically required for structural work, electrical, plumbing, ramps attached to the house, and elevators. Starting with permits avoids expensive rework later.
ADA guidelines call for a 32-inch minimum clear opening at doors and at least 36 inches of clear width along accessible routes like hallways. “Clear opening” means the actual passable width with the door open 90 degrees, measured from the door stop to the face of the door, not the nominal size printed on the door itself.
A standard 36-inch door slab typically produces close to a 32-inch clear opening once hinges and stops are accounted for, which is why 36 inches has become the practical framing target for accessible doors. Ask your contractor to confirm the measured clear width after trim is installed, not just the rough opening.
For hallways, 36 inches is the minimum; 42 to 48 inches is preferred anywhere a caregiver needs to walk beside a wheelchair, or in high-traffic areas.
Common renovation strategies:
Prioritize wider doors at the main entry, primary bedroom, bathroom, laundry, and kitchen. Lever handles are easier to operate than round doorknobs, especially for anyone with limited hand strength or arthritis. Mount handles 34 to 48 inches above the floor with at least 1.5 inches of clearance behind them for an easier grip. On exterior doors, leave a landing at least 60 inches deep on both sides so there’s room to turn and operate the door safely from a wheelchair or walker.
A safe residential ramp follows the ADA 1:12 maximum slope guideline: 1 inch of rise for every 12 inches of ramp run, with a minimum clear width of 36 inches. Flatter slopes, 1:16 or gentler, are easier for most users. Where possible, a zero-step entry removes the need for a ramp altogether and eliminates a common tripping hazard.
A few working examples: a 24-inch rise from driveway to porch needs at least 24 feet of ramp, not counting landings. A 12-inch step needs at least 12 feet of run.
Landing requirements:
Where a full-length ramp isn’t practical, alternatives include regrading the yard for a no-step entrance, short threshold ramps for 1 to 2-inch transitions, or a vertical platform lift. For weather, plan for covered entries, drainage, and materials that stay slip-resistant in snow, ice, or rain.
Ask contractors for drawings that show slope ratio and landing sizes before construction starts.
Bathrooms are the highest-risk room in the house for falls. The CDC reports that roughly one in four adults 65 and older experiences a fall each year, and a large share of those happen in the bathroom. An accessible bathroom renovation typically starts with a curbless shower, grab bars, and enough room to maneuver.
Mount horizontal grab bars 33 to 36 inches above the finished floor, near toilets and inside showers. During renovation, have your contractor install blocking, 2×8 or 2×10 lumber, behind the drywall so bars anchor into solid wood rather than drywall alone.
Shower upgrades for a safer bathroom:
Comfort-height toilets sit at 17 to 19 inches from floor to seat. Leave at least 18 inches from the toilet centerline to a side wall for grab bar mounting, and plan for a 60-inch turning radius where wheelchair transfers happen. For sinks, keep the counter no higher than 34 inches, with knee clearance of at least 27 inches high, 30 inches wide, and 19 inches deep underneath. Round exposed corners and insulate hot water pipes under the sink.
Slope shower floors gently to a linear drain to avoid low spots that catch water. A touchless or motion-sensor faucet, an anti-scald valve, and brighter LED lighting over the mirror and inside the shower all help with aging eyes and limited mobility alike.
An accessible kitchen balances safe circulation, reachable storage, and appliances that are safe to use while seated or standing. Allow at least 40 to 48 inches between opposing counters for a wheelchair or walker to pass through. At least one work surface or sink should sit no higher than 34 inches, with knee space underneath.
Storage and access ideas:
Provide 30-by-48-inch clear floor space in front of major appliances and sinks, and a 60-inch turning circle if a wheelchair user needs to use the kitchen independently. For lighting, add task lighting under cabinets and set light switches around 42 inches high, within the standard 15 to 48-inch reach range. Place outlets where plugging in a small appliance doesn’t require bending or reaching behind equipment.
Plan kitchen changes alongside other renovation projects where you can, since combining trades typically lowers total cost.
A stair lift and a residential elevator are the two main ways to make upper floors accessible. The right choice depends on mobility level, available space, future needs, and budget.
A stair lift is a seat that travels along the stairs. It suits people who can sit and transfer but struggle with climbing. It costs less upfront than an elevator and needs minimal structural change. It doesn’t carry a wheelchair, though, can be difficult for people with significant balance issues, and narrows the usable stair width.
Residential elevators serve a broader range of needs. Compact, shaftless models like Pneumatic Vacuum Elevators (PVE) install in as little as 2 to 3 days, require no pit or machine room, and can be retrofitted through an existing floor. PVE offers single-passenger, multi-passenger, and wheelchair-accessible models, all panoramic and air-driven.
| Feature | Stair lift | Shaftless vacuum elevator (PVE) |
|---|---|---|
| Carries a wheelchair | No | Yes, on wheelchair-accessible models |
| Installation time | Often 1 day | Typically 2 to 3 days |
| Structural changes | Minimal (rail along the stairs) | Floor opening only; no pit or machine room |
| Footprint | Along the stair run | Circular cab, fits within living space |
| Starting cost | Varies by stair shape and length | Around $35,000, averaging near $45,000 installed |
When you’re planning to age in place, or more than one household member needs step-free access, an elevator is often the more practical long-term choice.
These spaces come down to clear pathways, safe transfers, and easy control of lighting, especially for nighttime trips and emergency exits.
For bedrooms, occupational therapists often recommend a bed height of about 20 to 23 inches from the floor to the top of the mattress, since that’s close to typical wheelchair seat height and makes transfers easier. Leave clear space on at least one side of the bed for a wheelchair or walker, and keep circulation paths 36 to 48 inches wide. Lower closet rods to 42 to 48 inches, use open shelving for everyday items, and avoid storing anything heavy above shoulder height.
Hallways and living rooms need 36 inches of width at minimum, 42 to 48 inches preferred. Remove narrow console tables and rugs that catch wheels or feet, and keep 60-inch turning areas at hallway junctions. Motion-sensor lighting helps with nighttime safety, rocker or large-paddle switches at about 42 inches are easier to operate than small toggles, and contrasting wall and floor colors help with depth perception for aging eyes.
For doors in these spaces, use lever-style handles, smart locks where it makes sense, and windows that can be operated with one hand from a seated position. Keep pathways to exits clear of heavy furniture, and maintain at least one accessible route out of the home from the main living areas in case of an emergency.
Keep every critical dimension in one place so you can check contractor plans against it. This covers doors, hallways, ramps, bathrooms, kitchens, and stairs.
| Feature | ADA minimum | More comfortable |
|---|---|---|
| Door clear opening | 32 in (815 mm) | 36 in slab, to allow for hardware and trim |
| Hallway width | 36 in (915 mm) | 42 to 48 in, for a caregiver plus wheelchair |
| Ramp slope | 1:12 max (rise:run) | 1:16 or gentler |
| Ramp width | 36 in (915 mm) | 42 in, for roomier transitions |
| Grab bar height | 33 to 36 in (840 to 915 mm) | Match to user’s elbow height where possible |
| Toilet seat height | 17 to 19 in (430 to 485 mm) | Upper end for taller users |
| Counter/sink max height | 34 in (865 mm) | 32 to 34 in, depending on use |
| Knee clearance under sink | 27 in H x 30 in W x 19 in D | Generous toe space, insulated pipes |
| Switches and outlets | 15 to 48 in above floor | Center of that range for most users |
| Turning radius | 60 in diameter circle | Larger where fixtures crowd the space |
For stairs, even alongside a lift or elevator, keep riser heights consistent, use a tread depth of at least 10 inches (11 inches if there’s no nosing), install sturdy handrails at 34 to 38 inches, and add high-contrast nosing strips for visibility.
Print this checklist or save it for meetings with builders, architects, and elevator dealers. ADA figures here are a planning benchmark; local building code may override some of these dimensions, so a code check with your permitting office is still essential.
Most homeowners can’t tackle every accessible renovation at once. Phasing by safety impact and cost keeps the project manageable.
Tier 1, immediate needs: Grab bars, brighter LED lighting, non-slip flooring, lever handles, and repositioned light switches. These typically run in the low hundreds of dollars each and address the most common safety hazards first.
Tier 2, medium-term layout changes: Widening doorways, bathroom and kitchen remodels, a curbless shower, and ramp construction. Bathroom remodels at this scope typically run in the tens of thousands of dollars, depending on plumbing work.
Tier 3, long-term investments: Home elevators, major structural changes, and whole-home automation. Elevator pricing depends on the number of stops, cab size, and finishes; PVE’s home elevator cost guide breaks down those variables in detail.
A few financial assistance options are worth checking into. The USDA’s Section 504 program offers loans and grants to eligible rural homeowners. Veterans may qualify for a VA Specially Adapted Housing grant if they have a qualifying service-connected disability. A number of states run their own accessibility modification grants as well. Talk with lenders, insurance providers, and local agencies about grants or low-interest loans that may apply to your project.
A note on tax deductions: home accessibility modifications can sometimes qualify as a deductible medical expense under IRS rules, but three conditions typically apply: the improvement must be medically necessary, only the portion of qualifying medical expenses above 7.5% of your adjusted gross income is deductible, and you must itemize deductions to claim it. Rules and thresholds can change, so confirm current details with a tax professional or the current IRS publication before assuming a renovation qualifies. This is general information, not tax or legal advice.
Group similar trades, like plumbing and electrical, into the same phase to reduce repeat visits and cost. Track expenses and change orders carefully, and make sure any accessibility features, including an elevator, are clearly spelled out in your contracts and drawings.
An accessible renovation adds immediate quality-of-life benefits along with potential resale advantages. Features like zero-step entries, wider doors, and step-free bathrooms appeal to a broad range of buyers, not just people currently using a wheelchair or walker.
Residential elevators in particular can make a multi-story home more marketable to older buyers and position it well in higher-end listings. Returns vary by market, but elevators tend to make a home more competitive in that segment.
The non-financial benefits matter just as much: staying in a familiar neighborhood, avoiding the cost and disruption of a move, and keeping your independence longer. If you’re not ready for every upgrade now, plan for later: install blocking for future grab bars, stack closets where a future elevator could go, and wire for smart home controls even if the devices come later.
A few practical questions homeowners ask that aren’t fully covered above.
Combine a step-free entrance, widened interior doors, and either a wheelchair-accessible residential elevator or a vertical platform lift. Shaftless options like PVE’s panoramic elevators fit into existing living space with less structural work than a traditional elevator and typically install in 2 to 3 days. Talk with both an accessibility specialist and an elevator dealer to evaluate your floor layout, weight limits, and electrical needs before committing. PVE’s small residential elevator options are worth a look if floor space is tight.
No, not usually. ADA regulations apply to public and commercial spaces, not most private homes, unless your local building code specifically incorporates parts of the standard. It’s still useful as a safety and performance benchmark for door width, ramp slope, and grab bar height. Confirm actual requirements with your local permitting office.
Accessible design tailors a home to specific needs, like wheelchair use or limited grip strength, using measurements drawn from standards like ADA. Universal design creates spaces everyone can use comfortably without special adaptation, like no-step entries, lever handles, and open floor plans. Most accessible home renovations blend both, so the home feels natural for every age and ability rather than clinical.
Ask about past accessibility projects, request references from clients with disabilities, and look for a Certified Aging-in-Place Specialist (CAPS) credential. A contractor who understands the work will answer questions about door clearances, ramp slopes, and grab bar blocking with specific numbers, not vague reassurances.
It depends heavily on scope. Tier 1 items like grab bars and lighting run in the low hundreds of dollars. Bathroom remodels and doorway widening typically run into the tens of thousands.
Start with the room that presents the biggest daily obstacle, whether that’s a step at the front door, a bathroom that’s hard to use safely, or a staircase that’s become a problem. Work through the checklist above with your contractor or a CAPS-certified specialist, and treat the ADA numbers as your starting benchmark rather than the final word, since local code and your own needs may adjust some of them.
If a home elevator is part of your long-term plan, PVE’s team can walk through floor layout, model options, and installation timing for your specific home. Request a free consultation to get started.
Home elevators are no longer just luxury items—they’re practical solutions for homeowners seeking accessibility, future-proofing, or simply more convenience.
As aging-in-place and multi-generational living trends rise, more families are investing in residential elevator systems.
But let’s be honest: installing a home elevator is a major decision, and for many, cost is the first concern.
The good news?
Financing a home elevator is easier and more accessible than you might think.
Options ranging from flexible home improvement loans to government-backed grants, there are a variety of options designed to make home mobility affordable, without draining your savings.
In this article, we’ll break down real-world ways to fund your installation and highlight smart tips to stretch your budget further.
Residential elevators can vary widely in cost depending on the model, number of floors, installation needs, and any custom features.
Pneumatic Vacuum Elevators (PVE), known for their sleek design and low-maintenance technology, are especially efficient when it comes to installation and long-term use, with models like PVE30, PVE37, and PVE52 offering tailored solutions for different home spaces and accessibility needs.
While we won’t throw out exact figures (since every home and model is different), elevators can cost up to several tens of thousands of dollars.
That said, many PVE customers are surprised at how competitive the total investment can be—especially when considering long-term value, accessibility benefits, and added property appeal.
Tip: PVE elevators don’t require a machine room or pit, which can reduce structural modifications—and therefore, cost.
Financing a home elevator through a loan is one of the most common methods. Let’s look at your options:
Example: A homeowner in Pennsylvania used a HELOC from their local credit union to fund a two-stop elevator installation that allowed their elderly parents to remain in the home safely.
For homeowners without significant equity, the FHA Title I Loan Program can be a game-changer.
Where to start: Visit HUD.gov to find participating lenders in your state.
Did you know that pneumatic vacuum elevators are among the most energy-efficient vertical transportation options on the market? Unlike traditional elevators, they consume power only during ascent—gravity handles the descent.
While elevators don’t always qualify for energy tax credits, some states offer green improvement rebates that could apply depending on your project. Additionally, elevators that contribute to overall home efficiency or accessibility might count toward broader sustainability upgrade packages.
Tip: Check with your utility provider or browse DSIREUSA.org for programs in your area.
For homeowners with mobility challenges or disabilities—or those caring for someone who does—grants may be available to help offset elevator costs.
Many states offer Home Modification Grants for aging-in-place initiatives or residents with disabilities. For example:
In many cases, the simplest path to financing your home elevator installation is directly through the elevator provider or a trusted third-party financing partner.
While Pneumatic Vacuum Elevators (PVE) does not currently offer in-house financing, many of the dealers and installation partners across the country are connected with reputable lenders who specialize in home improvement financing.
Some of the most commonly used third-party platforms include:
These platforms often provide:
This type of financing allows you to bundle the total project cost—including installation, site prep, and any required modifications—into one manageable monthly payment. For many homeowners, this removes the upfront financial burden and allows them to begin the project sooner.
Next Step: Speak with your local PVE-certified dealer or installation partner. They can walk you through available financing options in your area and connect you with lenders who understand the home accessibility space.
Even with financing or grants, many homeowners are looking for practical ways to reduce the overall cost of installing a residential elevator. Here are several smart, proactive strategies to help you stay within budget while still achieving a safe, stylish, and functional upgrade:
Each additional stop or floor adds complexity to the installation. If your home allows, choosing a two-stop elevator instead of three can significantly reduce both equipment and labor costs. Many PVE customers find that a two-level elevator meets their needs while staying well within budget.
If you’re already planning a home remodel or addition, incorporating elevator installation at the same time can lower your total project cost. You’ll save on permitting, construction labor, and demolition fees—especially since PVE elevators require minimal structural changes thanks to their self-supporting design.
Unlike traditional elevator systems that require pits, hoistways, or machine rooms, PVE models are shaftless and pneumatic, making them ideal for retrofits. Their minimal footprint not only preserves square footage but also reduces the need for costly structural alterations. This can be a major cost-saver for homes with limited space or complex layouts.
Some elevator dealers offer discounts during the off-season (typically late fall and winter) when demand is lower. Scheduling your installation during a slower period can potentially lead to savings or even free upgrades.
For those installing a home elevator as a medical necessity—such as to accommodate a disability—certain tax-advantaged savings accounts like Health Savings Accounts (HSAs) or Flexible Spending Accounts (FSAs) may be used. You’ll need a physician’s note or documentation, and eligibility may vary, so check with your tax advisor.
During the planning phase, separate essential features (like the number of stops or entry directions) from aesthetic upgrades. For example, glass panels and custom finishes can always be added later, once your main installation is complete and financed.
Always get multiple quotes from certified PVE installers. Let them know your target budget early on—they may be able to recommend creative solutions like phasing in upgrades or using existing openings to reduce construction costs.
Pro Tip: Some homeowners save by opting for a standard color or design first, then upgrading finishes once they’ve had time to settle in with their new elevator system.

Installing a home elevator is a major step—but it doesn’t have to be a financial burden.
Planning for the future, improving mobility, or adding lasting value to your home doesn’t have to come with financial stress.
With a variety of financing options and creative cost-saving strategies, installing a home elevator is more achievable than you might think.
At Pneumatic Vacuum Elevators, we’re proud to offer energy-efficient, space-saving elevator models that work beautifully in homes of all shapes and sizes.
We’re also here to guide you through every step of the process—including helping you explore financing options that fit your lifestyle.
Ready to take the next step?
Contact us today for a free consultation and personalized quote—your future-friendly home upgrade starts here.
Aging at home has become a top priority for older adults who want to maintain independence, comfort, and familiarity.
According to AARP, “nearly 77% of adults 50 and older want to remain in their homes as they age.” But for many, mobility challenges—especially navigating stairs—can turn multi-story homes into safety hazards.
That’s where home elevators come in. Modern technology has made residential elevators more accessible than ever, especially for those with limited mobility or chronic conditions.
Among the available options, pneumatic vacuum elevators (PVEs) stand out for their safety, simplicity, and elegant design—making them one of the best choices for elderly homeowners and caregivers alike.
As we age, our physical needs change—and so should our homes. Features like narrow staircases, slippery floors, and uneven entryways can become dangerous or exhausting to navigate.
For individuals with conditions like arthritis, balance issues, or vision impairment, stairs can present a daily risk.
– Falls are the leading cause of injury among older adults. According to the CDC, “1 in 4 Americans aged 65+ falls each year, and over 3 million are treated in emergency departments for fall injuries annually.”
– Common risk factors include limited mobility, use of walkers or canes, and chronic pain conditions.
Accessible home design is no longer just a luxury—it’s a necessity. Adding a home elevator can eliminate stair-related risks and empower aging homeowners to continue enjoying every level of their home safely.
Not all home elevators are created equal, especially when it comes to supporting the needs of elderly users. The right elevator should combine functionality, safety, and ease of use. Here’s what to look for:
For families supporting aging loved ones, these features are more than conveniences—they’re lifelines that reduce physical risk and mental stress.
Pneumatic vacuum elevators offer a unique solution that aligns perfectly with the needs of aging homeowners. Here’s what makes PVE models particularly well-suited for elderly users and those with mobility concerns:
Traditional elevators often require extensive renovations, including digging a pit or building a shaft—disruptive and costly. PVEs are shaftless and self-supporting, which means they can be installed with minimal structural modification.
Unlike traditional cable elevators, PVEs use air pressure to move between floors. They consume electricity only during ascent, while descent is smooth and gravity-powered, resulting in a gentle, comfortable ride—ideal for individuals sensitive to motion or noise.
With models starting at just 30 inches in diameter, PVE elevators fit in tight spaces where traditional systems can’t. This is perfect for retrofitting into existing homes without sacrificing aesthetics or flow.
The panoramic design reduces the feeling of confinement, which can be particularly important for seniors who feel anxious in enclosed spaces. Natural light and visibility enhance safety and ease of use.
With fewer moving parts and no cables or pistons, PVEs are low-maintenance by design. For elderly users and caregivers, this means fewer breakdowns and less ongoing upkeep.
PVE offers three core models to suit various needs and mobility levels:
All models include easy-to-use controls, level floor alignment, and emergency safety systems—making them well-equipped for a variety of mobility scenarios.
When installing a home elevator for elderly users, safety is paramount. Fortunately, pneumatic vacuum elevators are engineered with multiple fail-safes and backup systems to provide peace of mind:
Emergency Brake System: Activates automatically in the event of power loss or pressure disruption.
Battery Backup: Allows the elevator to safely descend to the ground level during a power outage.
Automatic Locks and Pressure Monitoring: Keeps the cabin secure and prevents unsafe movement.
Two-Way Phone or Intercom: Enables users to communicate with family or emergency services if needed.
Additionally, because PVEs have fewer mechanical components than traditional elevators, maintenance requirements are minimal—another key benefit for elderly homeowners and their families.
Time and disruption are major considerations when retrofitting a home for accessibility. Traditional elevators often require weeks of construction and major home alterations. Pneumatic elevators, however, can often be installed in just 2–3 days by certified professionals.
Benefits of PVE installation for elderly households include:
This fast and non-invasive process makes PVEs ideal for seniors who may not want—or be able—to leave the home for extended periods during remodeling.
Beyond practicality, a home elevator can be life-changing for seniors. It promotes:
For many families, installing a home elevator is not just a practical solution—it’s an investment in health, safety, and comfort.

Choosing the right home elevator is an essential step toward safer, more comfortable aging in place.
Pneumatic vacuum elevators offer a unique blend of space-saving design, smooth operation, and minimal maintenance, making them one of the best solutions available for elderly users and individuals with mobility concerns.
If you or a loved one are considering upgrading your home for accessibility, now is the time to explore your options.
PVE’s residential elevator models are not only safe and efficient—they’re also elegant and surprisingly easy to install.
Schedule a free consultation today to learn how a PVE elevator can help you or your family maintain independence and enjoy every level of your home for years to come.
If you’re looking to enhance your home with added comfort, mobility, and modern design, a small home elevator could be the perfect upgrade.
Compact residential elevators—especially pneumatic vacuum elevators—offer an elegant way to move between floors while maximizing space and minimizing renovation stress.
Maybe you’re updating your home for accessibility, increasing its value, or simply embracing a more luxurious lifestyle, stylish small elevators blend seamlessly into almost any home.
Let’s explore vacuum elevator options that fit your home and style.
Vacuum elevators stand out for their sleek design, minimal footprint, and smart functionality. They’re easy to install, energy-efficient, and come in a range of customizable options to suit your interior.
These futuristic lifts are also low-maintenance and safer than many people assume, making them a smart long-term investment. If you’re thinking about adding an elevator to your home, here’s what makes these compact designs a top choice:
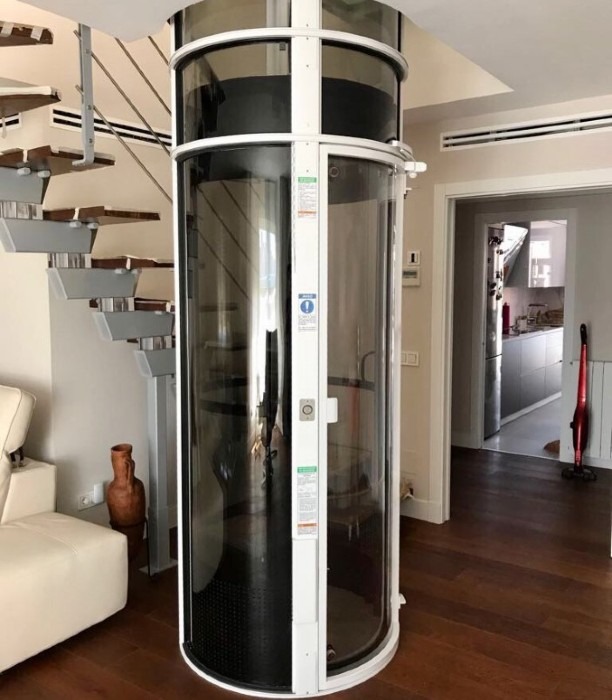
Vacuum elevators are designed for homes where space is limited or traditional elevator shafts aren’t feasible. Unlike hydraulic or cable-driven systems, vacuum elevators don’t need a pit, machine room, or counterweights. Instead, they use air pressure to move smoothly between floors—making them ideal for tight spaces like stairwells or corners.
This patented pneumatic design allows for faster and less invasive installation. You won’t need major construction or structural changes, which helps reduce both costs and timelines. Installation can often be completed in just 2–3 days, depending on the model and home layout.
Their minimal footprint and sleek silhouette integrate effortlessly into modern or classic interiors—without sacrificing valuable living space. Whether you live in a multi-story townhouse or a single-level home planning for future aging-in-place upgrades, these elevators provide versatility without compromise.
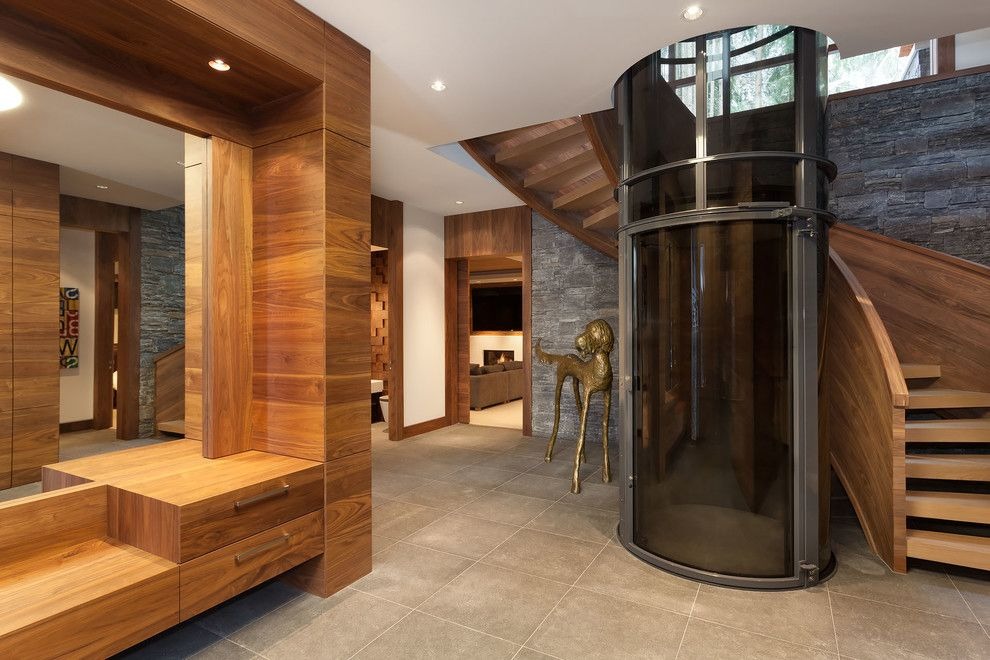
One of the most striking features of vacuum elevators is the use of clear, panoramic glass walls. These 360-degree views make every ride a visual experience—whether you’re admiring a city skyline or watching the scenery from a hillside home.
Glass adds openness and elegance, helping the elevator feel less like a machine and more like a design feature. In smaller rooms, the transparency adds visual space and light, while still offering privacy options like tinted or frosted glass.
Tempered and durable, the glass also ensures safety without compromising aesthetics. It’s designed to withstand daily use, resist scratching, and contribute to a modern architectural look. Many homeowners love that these elevators double as a conversation piece and a functional upgrade.
No rattling, grinding, or mechanical clunking here—vacuum elevators offer whisper-quiet operation. The air-powered system ensures each ride is smooth and stable, without wobbling or jerking.
This quiet performance is especially important in households where peace and privacy matter. Without the need for motors or gears, the elevator glides seamlessly, making it feel like a natural part of your home.
For families with kids, elderly parents, or people working from home, the reduced noise helps maintain a calm and distraction-free environment. The gentle start-and-stop motion also provides a safe and comfortable ride for users of all ages.
Vacuum elevators are built for energy efficiency. Since they use air pressure for lift and gravity for descent, they consume electricity only when moving up—not down.
With no heavy machinery or constantly running motors, these elevators are cost-effective and environmentally friendly. Their frictionless design reduces wear on components, cutting down on long-term maintenance costs while keeping your energy bill low.
If sustainability is a priority in your home upgrades, this type of elevator aligns with eco-conscious design. You can enjoy the convenience of vertical travel without adding a large carbon footprint.
Vacuum elevators aren’t just efficient—they’re personalizable too. Whether you prefer a minimalist clear glass look or something more private and bold, there’s a configuration that fits your style.
Models like the PVE30, PVE37, and PVE52 offer options based on capacity, size, and interior finish:
You can also choose between push-button or touchscreen controls, select interior colors, finishes, and flooring to match your home’s décor, and even adjust lighting options for the perfect ambiance.
Choosing the right vacuum elevator depends on a few key factors: available space, passenger needs, and the purpose of the installation.
Start by identifying potential installation points. Stairwells, corners, or spaces near entryways are common choices. The PVE30, with its minimal diameter, is great for tight spots, while the PVE52 offers more room for users needing wheelchairs or walkers.
If the elevator will be used daily by multiple people, or if you’re preparing for aging-in-place living, a larger model like the PVE37 or PVE52 may be more appropriate. These provide comfort and space for multiple riders or mobility aids.
Design elements matter, especially if the elevator will be in a prominent area of the home. Choose a glass tint or cabin finish that complements your home’s décor. With multiple options available—from sleek black frames to warm wood tones—you don’t have to sacrifice style for function.
Smaller models tend to cost less and install faster, while larger models may require more planning but offer added functionality. Vacuum elevators offer value long-term by increasing your home’s appeal and reducing mobility concerns.
Still unsure? Consulting with an authorized dealer or installer can help you assess your space and needs so you can make a confident choice.

Vacuum elevators combine form and function like no other. With sleek, compact designs and advanced technology, these stylish lifts add both value and versatility to your home.
They’re not just mobility solutions—they’re statement pieces that complement your space, improve your quality of life, and prepare your home for the future.
These elevators require less space, less energy, and less hassle to install—making them a smart and forward-thinking investment. From single-person cabins to wheelchair-accessible models, there’s a vacuum elevator designed to fit your unique space, lifestyle, and interior.
If you’re ready to enhance your home with a modern, space-saving solution that blends beauty and functionality, now is the time.
Explore our full gallery of vacuum elevator designs and request your free quote today!
A small home elevator is a compact lift designed to save space in residential settings. Vacuum elevators are ideal examples—pneumatic, efficient, and perfect for retrofits or new builds alike.
It uses air pressure to lift and lower the cabin. The system creates a vacuum to move the elevator upward, and gravity assists with descent no cables, pulleys, or machine rooms needed.
Yes! Vacuum elevators are ideal for retrofitting existing homes. They require minimal construction and no pit, making installation easy and non-disruptive.
Very little. Many vacuum elevator models fit within as little as 3 feet in diameter and can be installed in areas like corners, stairwells, or alongside walls.
Extremely. Because they only use power on the ascent, vacuum elevators consume far less energy than traditional systems and are a sustainable upgrade for modern homes.